Is your vacuum cleaner not picking up dirt like it used to? The problem might be a worn-out vacuum belt.
Changing the belt may sound tricky, but it’s easier than you think—and it can save you money on repairs or a new vacuum. In this guide, you’ll learn exactly how to change a vacuum belt step-by-step. By the end, your vacuum will be running like new again, making your cleaning faster and more effective.
Keep reading, and you’ll master a simple fix that keeps your home spotless without any hassle.
Signs Of A Worn Vacuum Belt
The vacuum belt plays a key role in keeping your vacuum cleaner running well. Over time, this belt can wear out or break. Knowing the signs of a worn vacuum belt helps you fix the problem fast. Catching these signs early can save your vacuum from more damage.
Decreased Suction Power
Your vacuum cleaner may lose suction if the belt is worn. The brush roll might not spin properly. Dirt and debris stay on the floor. The vacuum seems weaker even after cleaning the filter. This is a clear sign the belt needs checking or replacing.
Unusual Noises
A worn belt can cause strange sounds. You might hear squeaking, grinding, or humming noises. These sounds happen because the belt slips or rubs against parts. The vacuum may sound louder than usual or make jerky noises. These noises warn you about belt trouble.
Brush Roll Not Spinning
The brush roll spins to pick up dirt from carpets. A broken or loose belt stops this spinning. You may see the brush roll still when the vacuum runs. This reduces cleaning power and leaves dirt behind. Checking the belt can solve this spinning issue quickly.
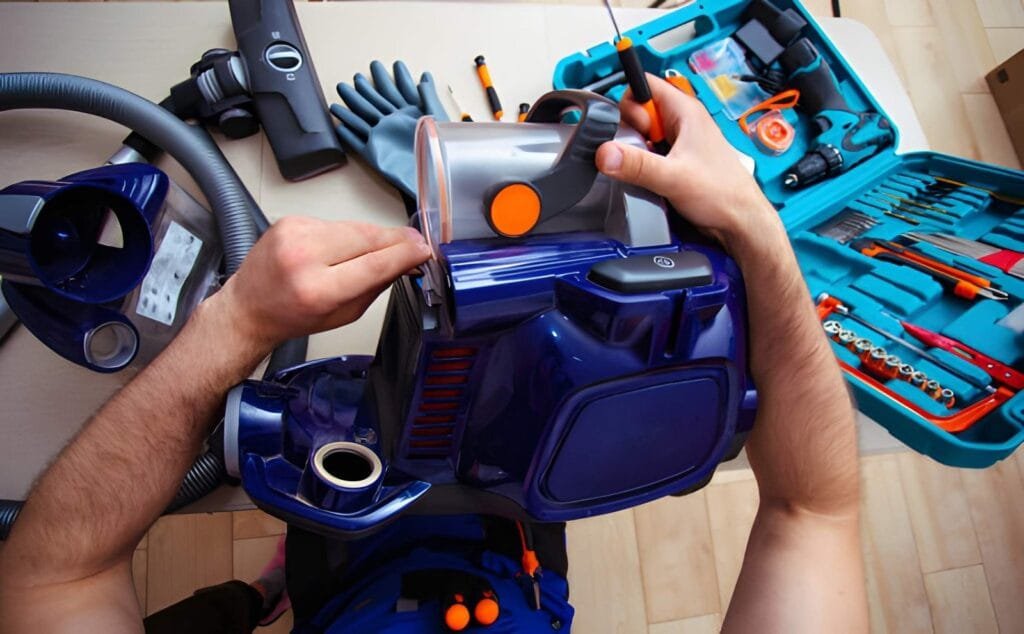
Tools Needed For Replacement
Changing a vacuum belt needs some basic tools. Having the right tools makes the job faster and easier. You will need a few simple items to replace the belt properly. These tools help you open the vacuum, remove the old belt, and clean the parts.
Screwdrivers
Screwdrivers help open the vacuum’s cover or base. Most vacuums use Phillips or flathead screws. A small set of screwdrivers works best. Use the right size to avoid stripping the screws. Keep them handy to remove and replace parts safely.
Replacement Belt
Choose the exact replacement belt for your vacuum model. Check the size and type before buying. Using the correct belt keeps the vacuum running well. A new belt ensures strong suction and proper brush movement. Keep the old belt for size comparison.
Cleaning Supplies
Cleaning supplies help remove dust and debris inside the vacuum. A soft cloth or brush works well. Use a small vacuum or compressed air to clear dirt. Clean parts before installing the new belt. This improves vacuum performance and belt life.
Preparing Your Vacuum
Before changing a vacuum belt, prepare the vacuum carefully. This step ensures safety and ease during the process. Taking time to prepare helps avoid damage to the vacuum and injury to yourself.
Unplugging The Device
Always unplug the vacuum from the power source first. This prevents any accidental starts. Safety is the top priority before you begin any repair or maintenance work.
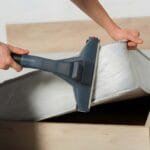
Removing The Vacuum Head
Next, detach the vacuum head or brush roll cover. Use a screwdriver if screws hold it in place. Removing this part gives clear access to the belt area.
Accessing The Belt Compartment
Locate the belt compartment under the vacuum head. Open the cover gently to avoid breaking clips. Now you can see the belt and roller clearly for replacement.
Removing The Old Belt
Removing the old vacuum belt is the first step in replacing it. This process helps you check the belt’s condition and prepare for the new one. Doing it carefully can save time and avoid damage.
Detaching The Brush Roll
Start by turning off and unplugging the vacuum. Find the brush roll cover and remove the screws. Lift the cover gently to access the brush roll. Slide the brush roll out slowly to avoid breaking parts. Keep the brush roll aside on a clean surface.
Sliding Off The Belt
Look for the belt wrapped around the brush roll and motor shaft. Use your fingers to slide the belt off the brush roll first. Then, carefully pull the belt off the motor shaft. The belt may be tight, so take your time. Avoid stretching or snapping the belt during removal.
Inspecting For Damage
Check the old belt for cracks, tears, or signs of wear. Look for hard or brittle spots that could break soon. Also, examine the brush roll and motor shaft for dirt or damage. Cleaning these parts can help the new belt last longer. Replace the belt if you find any damage.
Installing The New Belt
Installing the new vacuum belt is a key step in fixing your vacuum cleaner. This process ensures the vacuum works properly and cleans well. Careful installation prevents belt slipping or damage. Follow each step to fit the belt correctly and safely.
Positioning The Belt Correctly
Place the new belt over the motor shaft first. Make sure it lies flat without twists. Stretch the belt gently toward the brush roll. Loop it around the brush roll’s center. Check the belt sits evenly on both parts.
Reattaching The Brush Roll
Slide the brush roll back into its slot carefully. Align the ends with the holders on both sides. Push it firmly until it snaps into place. Avoid forcing it to prevent breaking parts. The brush roll should spin freely once attached.
Ensuring Proper Tension
Check the belt tension by turning the brush roll by hand. It should move smoothly but feel tight enough. Too loose means slipping; too tight risks breaking. Adjust the brush roll position if needed. Proper tension keeps the vacuum running well.
Testing The Vacuum
Testing the vacuum after changing the belt ensures it works correctly. This step checks if the belt fits well and spins the brush properly. A careful test prevents damage and keeps the vacuum running smoothly.
Reassembling The Vacuum
Put all parts back carefully. Make sure the belt is tight and the brush rolls freely. Snap covers and screws into place. Check for any leftover parts before moving on.
Powering On
Plug in the vacuum and turn it on. Listen closely for any unusual sounds. The brush should spin smoothly without slipping or stalling. If it stops, turn off immediately and inspect the belt.
Checking For Proper Operation
Move the vacuum across different floor types. Check if it picks up dirt well. Watch the brush roll to ensure steady rotation. A well-fitted belt means better cleaning and longer vacuum life.
Maintenance Tips To Extend Belt Life
Extending the life of your vacuum belt saves money and effort. Proper maintenance keeps the belt working longer and prevents breakdowns. Follow these simple tips to care for your vacuum belt effectively.
Regular Cleaning
Clean the vacuum and belt area often. Dust and hair can get stuck and wear out the belt. Remove debris from brushes and rollers carefully. A clean vacuum runs smoothly and protects the belt.
Avoiding Overloading
Do not use the vacuum on very thick carpets or heavy debris. Overloading the vacuum stresses the belt and motor. Use the right settings for different floor types. Light use helps the belt last longer.
Replacing Belts Periodically
Check the belt for cracks or signs of wear regularly. Old belts lose grip and can break suddenly. Replace the belt as recommended by the manufacturer. Timely replacement keeps your vacuum working well.
Frequently Asked Questions
How Do I Know If My Vacuum Belt Needs Changing?
Check if the vacuum brush roller stops spinning or makes unusual noises. A worn or broken belt often causes these issues. Regularly inspect the belt for cracks or stretching. Replacing it promptly maintains vacuum performance and prevents motor strain.
What Tools Are Needed To Change A Vacuum Belt?
Typically, you need a screwdriver to remove the vacuum’s bottom plate and possibly pliers to remove the old belt. Some vacuums may require specific tools. Always consult your vacuum’s manual for exact tool requirements to avoid damage.
How Often Should I Replace My Vacuum Belt?
Replace the vacuum belt every 6 to 12 months, depending on usage. Frequent vacuuming or heavy debris can wear belts faster. Regular inspection helps identify wear early and ensures optimal vacuum performance.
Can I Use Any Vacuum Belt For Replacement?
No, use a belt compatible with your vacuum model. Using the wrong belt may cause poor performance or damage. Check the manufacturer’s specifications or the vacuum manual for the correct belt type.
Conclusion
Changing a vacuum belt is simple with the right steps. Take your time and follow each part carefully. A new belt helps your vacuum work better and last longer. You save money by fixing it yourself. Keep your vacuum clean and check the belt often.
This small task keeps your home tidy and your machine running well. Try it today and enjoy a stronger vacuum.