If your Shark vacuum isn’t rolling smoothly, the roller might be stuck or dirty. Learning how to take the roller out of your Shark vacuum can save you time and money on repairs.
In this guide, you’ll find simple, step-by-step instructions that anyone can follow. By the end, you’ll know exactly how to remove, clean, and maintain the roller to keep your vacuum working like new. Ready to fix your vacuum and boost its performance?
Let’s get started!
Tools Needed
Before removing the roller from your Shark vacuum, gather the right tools. Having the correct tools makes the job easier and faster. It also helps avoid damage to the vacuum parts.
Most Shark vacuums require simple tools. You might already have them at home. Check this list to prepare before starting the roller removal.
Flathead Screwdriver
A flathead screwdriver helps to loosen screws or clips holding the roller. It fits well in tight spaces and can pry open parts gently.
Phillips Screwdriver
Some Shark vacuums use Phillips screws. This screwdriver has a cross-shaped tip to fit these screws perfectly. It helps remove screws without stripping them.
Needle-nose Pliers
Needle-nose pliers are useful for pulling out pins or small parts. They can also grip tight spots where fingers cannot reach.
Cleaning Cloth
A soft cleaning cloth helps wipe dust and hair from the roller area. It keeps the parts clean and ready for reassembly.
Work Gloves
Gloves protect your hands from dirt and sharp edges. They make handling parts safer and more comfortable.
Prepare The Vacuum
Preparing your Shark vacuum before removing the roller is important. This step makes the process safe and easy. A clean and unplugged vacuum avoids accidents. It also helps you access the roller smoothly.
Unplug The Vacuum
Always unplug the vacuum from the power source. This stops the vacuum from turning on by mistake. Safety first. No electricity means no risk of shock.
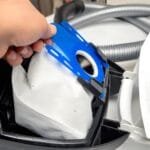
Empty The Dustbin
Remove the dustbin and empty it. This makes the vacuum lighter. It also prevents dust from spilling during the roller removal.
Lay The Vacuum Flat
Place the vacuum on a flat surface. This gives you better control. Working on a stable surface reduces the chance of dropping it.
Locate The Roller Cover
Find the roller cover on the vacuum’s base. It usually has clips or screws. Knowing this helps you open it easily and reach the roller.
Locate The Roller
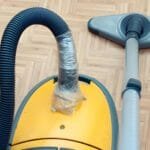
Locating the roller on your Shark vacuum is the first step in removing it. This part spins to help pick up dirt and debris from floors. Knowing exactly where the roller sits makes the process easier and faster.
The roller is usually found on the bottom of the vacuum head. You will need to flip the vacuum over carefully to see it clearly. It looks like a long, cylindrical brush or bar that runs across the width of the vacuum.
Check The Vacuum’s Bottom Plate
Start by placing the vacuum head upside down on a flat surface. Look for the bottom plate that covers the roller. This plate is often held by clips or screws. Identifying this plate helps you access the roller quickly.
Identify The Brush Roller
The roller may have bristles or be smooth, depending on your model. It usually sits between the two wheels of the vacuum. Spotting the brush roller is key before trying to remove it.
Look For Release Mechanisms
Some Shark vacuums have buttons or tabs near the roller. These help release the bottom plate or roller. Finding these makes removing the roller simpler and safer.
Remove The Brushroll Cover
Removing the brushroll cover is the first step to take out the roller from your Shark vacuum. This cover holds the brushroll firmly in place. Removing it carefully helps you clean or replace the roller easily. Follow these simple steps to do it right.
Turn Off And Unplug The Vacuum
Safety first. Make sure the vacuum is off and unplugged. This prevents any accidents while working on the brushroll cover.
Flip The Vacuum Upside Down
Lay the vacuum on a flat surface with the bottom facing up. This position gives you clear access to the brushroll cover.
Locate The Brushroll Cover Screws
Look for the screws or clips holding the cover. They are usually near the edges of the brushroll area.
Use A Screwdriver To Remove Screws
Use a proper screwdriver to unscrew the cover screws. Keep the screws safe so you can use them later.
Lift Off The Brushroll Cover
Gently lift the cover away from the vacuum. Avoid using too much force to prevent damage.
Now, the brushroll is exposed and ready for removal or cleaning. Removing the cover carefully protects your vacuum and keeps it working well.
Release The Roller
Releasing the roller on your Shark vacuum is the first step in cleaning or replacing it. This process helps keep your vacuum running smoothly. It also prevents damage caused by tangled hair or debris stuck on the roller. Follow these simple steps to release the roller safely and easily.
Power Off And Unplug The Vacuum
Always turn off the vacuum before starting. Unplug it from the power source. This ensures safety while handling the roller. Avoid any accidental starts that could cause injury.
Flip The Vacuum To Access The Roller
Place the vacuum head down on a flat surface. This gives clear access to the bottom plate. The roller is located beneath this plate. Check that you have enough light to see clearly.
Locate The Release Mechanism
Find the release button or latch near the roller area. Shark vacuums usually have a simple clip or tab. Press or pull this to unlock the roller cover. Do not force it to avoid breaking the parts.
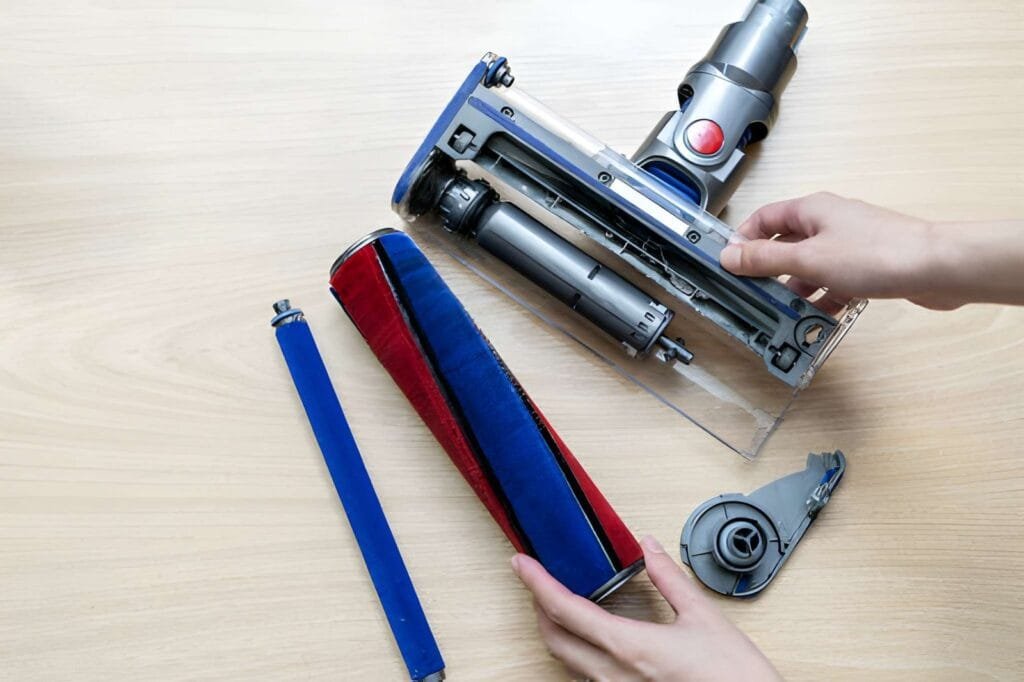
Remove The Roller Carefully
Lift the roller out gently once the cover is unlocked. Note the roller’s position for easy reassembly. Check the roller for any stuck hair or debris. Clean it before putting it back.
Clean Or Replace The Roller
The roller on your Shark vacuum helps pick up dirt and dust from floors. Over time, it can get dirty or worn out. Cleaning or replacing the roller keeps your vacuum working well. This section guides you through the process clearly and simply.
How To Clean The Roller
First, remove the roller from the vacuum. Use scissors or a brush to cut and pull off hair and threads. Wipe the roller with a damp cloth to remove dust. Let it dry before putting it back. Clean the roller regularly to avoid clogs and maintain suction.
When To Replace The Roller
Check the roller for cracks, worn bristles, or damage. If it looks worn or does not spin smoothly, replace it. Using a damaged roller can reduce cleaning power. Purchase the correct replacement roller made for your Shark model. Install it carefully to keep your vacuum working well.
Reassemble The Vacuum
Reassembling the Shark vacuum after removing the roller is simple. Careful steps help your vacuum work well again. Follow these steps to put everything back correctly.
Clean The Roller And Housing
Before reassembly, clean the roller and its housing. Remove dust, hair, and debris. This keeps the vacuum running smoothly and avoids blockages.
Place The Roller Back
Put the roller carefully into its slot. Make sure it fits snugly and spins freely. Align it with the belt and the housing guides.
Secure The Roller Cover
Attach the roller cover back onto the vacuum base. Press firmly until it clicks into place. This keeps the roller safe during use.
Check The Belt Position
Ensure the belt is on the roller and motor pulley. The belt should be tight but not stretched. Proper belt tension helps the roller turn efficiently.
Test The Roller Movement
Manually spin the roller to check it moves smoothly. No resistance or noise should occur. This confirms correct installation.
Reattach The Vacuum Head
Place the vacuum head back on the main unit. Secure it with any clips or screws. The vacuum is now ready to use.
Test The Vacuum
Testing the vacuum after removing the roller is important. It helps check if the vacuum works well. You can spot any problems early. Testing saves time and effort later.
Check The Power And Suction
Plug in the vacuum. Turn it on and listen carefully. The vacuum should have strong suction. If suction is weak, the roller may not be installed right. Or there might be a blockage.
Inspect The Roller Movement
Watch the roller as the vacuum runs. It should spin smoothly and evenly. No jerks or stops. If the roller does not move, check its placement. Make sure the belt is tight and not broken.
Test On Different Floor Types
Try the vacuum on carpet and hard floors. The roller should adjust easily. It should pick up dirt well on both surfaces. If not, recheck the roller and the settings.
Troubleshooting Tips
Troubleshooting tips help solve common problems with removing the roller from a Shark vacuum. These tips make the process easier and faster. Understanding what to check can save time and prevent damage.
Sometimes the roller feels stuck or hard to remove. Simple checks often fix the issue. Follow these tips to keep your vacuum working well.
Check For Debris Around The Roller
Dirt and hair often wrap around the roller. This can block the roller from moving. Remove any visible debris carefully. Use scissors or a brush to clean tight spots.
Release The Locking Mechanism
Most Shark vacuums have a lock holding the roller. Make sure you press or slide the lock properly. If you miss this step, the roller will not come out. Check your model’s manual for exact instructions.
Use Proper Tools For Removal
Some rollers need a screwdriver or a coin to unlock. Use the right tool to avoid damage. Turn screws slowly and gently. Avoid forcing parts apart.
Inspect For Damage Or Wear
Worn parts can cause the roller to stick. Look for cracks or broken pieces. Replace damaged parts to keep the vacuum working well. Check the roller and housing carefully.
Clean The Roller And Housing
After removal, clean the roller and the surrounding area. Dust and dirt build-up can block movement. Use a dry cloth or soft brush. Keep parts dry to avoid rust.
Frequently Asked Questions
How Do I Remove The Roller From A Shark Vacuum?
To remove the roller, first unplug your Shark vacuum. Locate the roller cover and press the release buttons. Lift the cover and gently pull out the roller brush for cleaning or replacement.
What Tools Are Needed To Take Out Shark Vacuum Roller?
No tools are required to remove the roller. Shark vacuums have a simple release mechanism. Just press the buttons or latches near the roller cover to access the roller.
How Often Should I Clean The Shark Vacuum Roller?
Clean the roller every 1-3 months depending on usage. Regular cleaning prevents hair and debris buildup, maintaining vacuum performance and prolonging roller life.
Can I Replace The Shark Vacuum Roller Myself?
Yes, you can easily replace the roller yourself. Remove the old roller by releasing the cover, then insert the new roller until it clicks securely.
Conclusion
Removing the roller from your Shark vacuum is simple with the right steps. Take your time and follow each part carefully. Doing this helps keep your vacuum working well. Clean rollers improve suction and extend vacuum life. Regular checks prevent damage and save money later.
Now, you can handle this task with confidence. Keep your Shark vacuum ready for any mess. Easy maintenance makes cleaning less of a chore. You’ve got this!