Is your Shark vacuum suddenly refusing to charge? It’s frustrating when your trusted cleaning companion won’t power up, leaving your home chores at a standstill.
You might be wondering what’s causing this issue and how to fix it quickly. Don’t worry—you’re not alone, and there are simple reasons behind this problem that you can tackle yourself. Keep reading to discover why your Shark vacuum isn’t charging and what steps you can take to get it back to work in no time.
Common Charging Issues
Many Shark vacuum users face charging problems at some point. Understanding common charging issues helps fix the problem quickly. These issues often relate to power source, battery health, or the charging dock. Knowing these can save time and avoid frustration.
Power Source Problems
The power source might be the main issue. The outlet may not supply power consistently. Check if other devices work in the same outlet. Loose plugs or damaged cords also stop charging. A faulty power strip can block electricity flow. Always plug the charger directly into the wall socket. This ensures steady power for the vacuum.
Battery Health Concerns
Batteries wear out after long use. An old or damaged battery cannot hold charge well. The vacuum may stop charging or lose power quickly. Extreme temperatures affect battery performance too. Cold or hot environments reduce battery life. Replacing the battery often solves charging issues. Regular use helps keep the battery active and healthy.
Charging Dock Malfunctions
The charging dock can cause problems too. Dust or dirt on the contacts blocks the connection. Check and clean the charging points gently. The dock’s internal parts may fail over time. Faulty docks need repair or replacement. Ensure the vacuum fits properly on the dock. A loose connection stops the charging process.
Diagnosing The Problem
Diagnosing why your Shark vacuum is not charging is the first step to fix the issue. This process helps you find the exact problem without guessing. Proper diagnosis saves time and avoids unnecessary expenses. Follow these simple checks to identify the cause of the charging problem.
Inspecting The Charger And Cord
Start by looking closely at the charger and cord. Check for any visible damage like cuts, frays, or bent plugs. A broken charger or cord can stop the vacuum from charging. Make sure the charger is firmly plugged into the vacuum and the power source.
Checking Battery Connection
Open the vacuum’s battery compartment. Ensure the battery is seated correctly with no loose connections. Dirt or corrosion on the contacts can block charging. Clean the contacts gently with a dry cloth to improve connection.
Testing With Alternate Power Outlets
Try plugging the charger into a different power outlet. Sometimes, the problem comes from a faulty outlet. Use an outlet that you know works well with other devices. This step helps rule out power supply issues outside your vacuum.
Quick Fixes To Try
When your Shark vacuum stops charging, quick fixes may solve the problem fast. These simple steps save time and avoid costly repairs. Try these easy solutions before seeking professional help.
Resetting The Vacuum
Resetting the vacuum can clear minor errors. Turn off the vacuum and unplug the charger. Wait for 1-2 minutes. Then, press and hold the power button for 10 seconds. Release the button and plug the charger back in. Turn the vacuum on and check if it charges.
Cleaning Charging Contacts
Dirty contacts block charging power. Find the metal contacts on the vacuum and charger. Use a soft cloth or cotton swab with rubbing alcohol to clean them gently. Remove dust and grime. Let the contacts dry completely. Reconnect the charger and try charging again.
Replacing Faulty Chargers
Chargers wear out over time. A damaged charger will not power the vacuum. Inspect the charger for cracks or frayed wires. Test the charger with a voltmeter if possible. Use a new, compatible charger if the old one is faulty. Always buy chargers from trusted sources.
When To Replace The Battery
Knowing when to replace your Shark vacuum battery helps keep your cleaner working well. A battery that no longer holds charge reduces cleaning power. This leads to frustration and wasted time. Understanding the signs can save you effort and money. Replacing the battery at the right time restores your vacuum’s full strength. It also extends the life of your device.
Signs Of Battery Wear
Your vacuum may show clear signs when the battery is old. The vacuum runs for a shorter time than before. It might not turn on at all. Charging may take much longer than usual. The vacuum can suddenly lose power during use. These signs mean the battery’s ability to hold charge is low. Checking these signs helps you decide if it’s time to replace the battery.
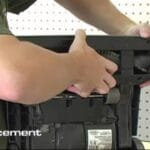
Battery Replacement Process
Replacing a Shark vacuum battery is simple and fast. First, turn off and unplug the vacuum. Remove the battery cover, usually found on the handle or base. Take out the old battery carefully. Insert the new battery in the same position. Secure the battery cover back in place. Finally, charge the vacuum fully before the next use. Following these steps ensures your vacuum works like new again.
Choosing The Right Replacement Battery
Selecting the correct battery is key for your Shark vacuum. Always check the model number on your vacuum. Buy a battery that matches this model exactly. Use genuine or high-quality batteries to avoid problems. Cheap batteries may not last long or fit well. A proper battery keeps your vacuum safe and efficient. This choice saves money and avoids further damage.
Preventive Measures
Taking preventive steps helps keep your Shark vacuum charging well. Small habits protect the battery and the charger parts. This stops common issues before they start. You save time and avoid frustration from a vacuum that won’t charge.
Proper Charging Habits
Always place the vacuum on the charger correctly. Avoid forcing the vacuum into the charging dock. Charge the battery fully before unplugging. Don’t leave the vacuum plugged in all the time. Give the battery a break after full charge.
Maintaining Charging Components
Keep the charging contacts clean and dry. Wipe the metal parts with a soft cloth often. Check the charger cord for damage regularly. Replace any worn or broken parts quickly. Store the charger in a cool, dry place.
Regular Battery Care Tips
Use the vacuum regularly to keep the battery healthy. Avoid letting the battery drain completely. Charge the vacuum soon after use. Store the vacuum with a half-charged battery if not used long. Follow the manufacturer’s instructions for battery care.
Seeking Professional Help
Sometimes, fixing your Shark vacuum at home can be tough. Seeking professional help is the best choice for complex problems. Experts can find the exact cause of charging issues fast. They have the right tools and skills to fix your vacuum safely.
Authorized Service Centers
Authorized service centers are official repair places for Shark vacuums. They use original parts to keep your vacuum working well. These centers follow Shark’s repair rules and guidelines. Your vacuum gets proper care from trained technicians. This ensures your vacuum stays reliable and lasts longer.
Warranty And Repair Options
Check if your Shark vacuum is still under warranty. Warranties cover certain repairs without extra cost. You might get a free battery or charger replacement. Some repairs might need approval from Shark before starting. Warranty terms vary, so read them carefully for your rights.
Cost Considerations For Repairs
Repair costs depend on the problem’s complexity and parts needed. Simple fixes like battery changes usually cost less. Major repairs or part replacements can be more expensive. Compare repair costs with buying a new vacuum. Sometimes, repair is cheaper and extends your vacuum’s life.
Frequently Asked Questions
Why Is My Shark Vacuum Not Charging Properly?
Your Shark vacuum might not charge due to a faulty charger, dirty charging contacts, or a depleted battery. Check the power source, clean the contacts, and try a different charger if possible. Replace the battery if it no longer holds a charge.
How Do I Fix A Shark Vacuum That Won’t Charge?
First, ensure the charger is plugged in and working. Clean the charging port and contacts. Reset the vacuum by turning it off and on. If it still won’t charge, test with a new charger or replace the battery.
Can A Dead Battery Cause Shark Vacuum Charging Issues?
Yes, a dead or old battery often causes charging problems. Batteries lose capacity over time and may fail to hold a charge. If your vacuum won’t charge, consider replacing the battery to restore full functionality.
Is A Faulty Charger Causing My Shark Vacuum Charging Problem?
A faulty charger can prevent your Shark vacuum from charging. Test the charger with another device or use a different charger for your vacuum. Replace the charger if it’s damaged or not providing power.
Conclusion
A Shark vacuum not charging can be frustrating. Check the power source and connections first. Clean the charging contacts gently to improve contact. Look for battery or charger damage that might block charging. Replace faulty parts to restore proper function.
Regular care helps prevent charging problems. Small fixes often solve the issue quickly. Stay patient and follow these simple steps. Your vacuum can work well again soon.