Is your vacuum cleaner not working like it used to? You don’t need to rush out and buy a new one just yet.
Fixing your vacuum cleaner yourself can save you time, money, and frustration. In this guide, you’ll discover simple steps to identify common problems and repair them quickly. Whether it’s a loss of suction, strange noises, or a broken belt, you’ll learn how to get your vacuum running smoothly again.
Keep reading, and you’ll be surprised how easy it can be to bring your vacuum back to life.
Common Vacuum Issues
Vacuum cleaners face common problems that reduce their performance. Knowing these issues helps you fix them quickly. Most problems are simple and need basic tools to repair.
Understanding common vacuum issues saves money and extends your vacuum’s life. Here are the main problems you might see and how to spot them.
Loss Of Suction
Loss of suction is the most common vacuum problem. It happens when air cannot flow properly through the vacuum. Check for blockages in the hose or dustbin. A full dustbag or filter can also reduce suction. Clean or replace filters regularly. Make sure the dust container is empty. Clear any debris blocking the air path.
Brush Roll Problems
The brush roll helps pick up dirt from carpets. If it stops spinning, cleaning becomes harder. Hair, threads, and fibers can wrap around the brush roll. This stops it from turning. Remove the brush roll and cut away any tangles. Check the belt that drives the brush roll. Replace the belt if it is broken or loose.
Clogged Hose And Filters
A clogged hose or filter reduces vacuum power. Dirt and dust build up over time. Remove the hose and look inside for blockages. Use a long object to push out clogs. Wash or replace filters as needed. Clean filters improve airflow and suction. Regular cleaning prevents major clogs and damage.
Strange Noises
Unusual noises often signal a problem inside the vacuum. A grinding sound can mean a broken belt or brush roll. A loud motor noise may indicate debris in the fan. Turn off the vacuum and unplug it. Inspect the brush roll and belt for damage. Remove any stuck objects inside the vacuum. Strange noises should never be ignored.
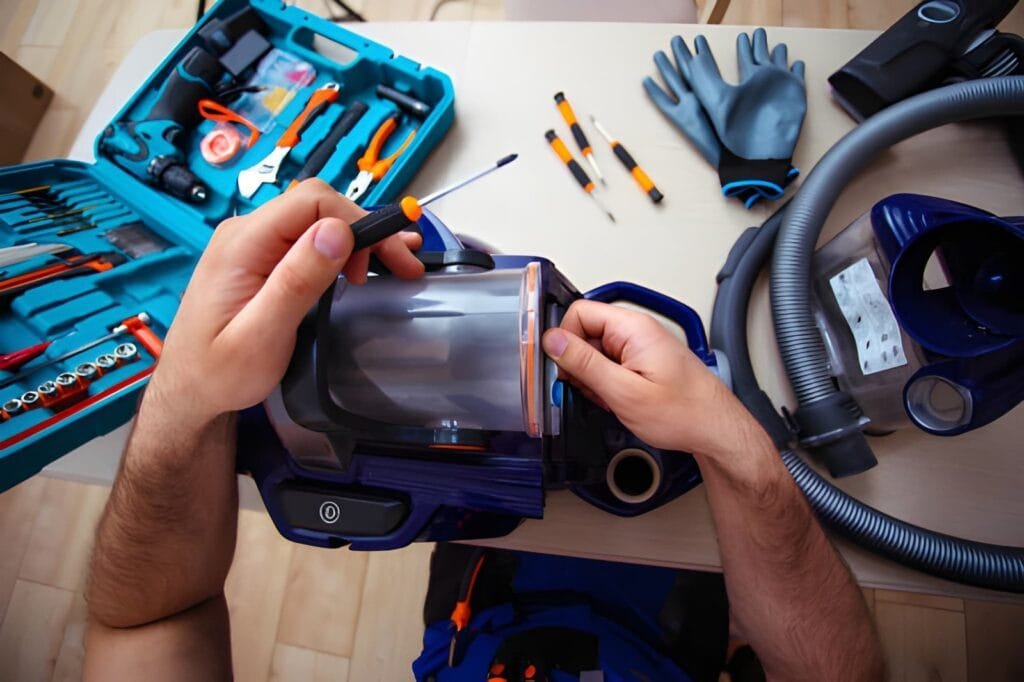
Tools Needed For Repairs
Repairing a vacuum cleaner requires the right tools. These tools help you fix problems quickly and safely. Having the right equipment makes the task easier and more efficient. Below are the main tools you need for vacuum cleaner repairs.
Basic Hand Tools
Start with simple hand tools. A screwdriver set is essential. Both flathead and Phillips screwdrivers are needed. Pliers help with gripping and pulling parts. A wrench set is useful for nuts and bolts. A small brush cleans dust inside parts. Keep a flashlight nearby for better visibility.
Replacement Parts
Identify the parts that often need replacing. Vacuum belts are common to wear out. Filters must be changed regularly for good suction. Bags or canisters collect dust and need replacement. Check the motor brushes if the vacuum is weak. Having these parts ready saves time during repairs.
Safety Gear
Safety is important during repairs. Wear gloves to protect your hands from sharp edges. Safety glasses keep dust and debris out of your eyes. Use a dust mask if working with fine particles. Ensure the vacuum is unplugged before starting any work. These steps prevent accidents and injuries.
Fixing Suction Problems
Fixing suction problems is key to making a vacuum cleaner work well again. Low suction means dirt stays on the floor. It also makes cleaning take longer and wastes energy. Many suction issues come from simple problems that anyone can fix. This section shows easy steps to find and solve suction troubles. Follow these tips to get strong suction back quickly.
Checking For Blockages
Blockages stop air from moving through the vacuum. Check the hose and brush for clogs. Remove any hair, dust, or debris stuck inside. Use a long stick or broom handle to push out dirt. Make sure the air path is clear from the nozzle to the dustbin. Blockages reduce suction power and cause the motor to work harder.
Cleaning Or Replacing Filters
Filters trap dust and keep the air clean. Dirty filters block airflow and lower suction. Take out the filters and tap them gently to remove dust. Wash washable filters with water and let them dry completely. Replace old or damaged filters with new ones. Clean filters help the vacuum pick up dirt better and keep the motor safe.
Inspecting The Belt
The belt turns the brush roll and helps pick up dirt. A broken or loose belt can cause weak suction. Look at the belt for cracks or wear. If the belt is loose, tighten or replace it. A good belt keeps the brush spinning fast and helps the vacuum clean well. Check the belt often to avoid suction problems.
Repairing The Brush Roll
Repairing the brush roll is a key step in fixing your vacuum cleaner. The brush roll picks up dirt and debris from carpets and floors. Over time, it can get tangled or worn out. Fixing it can improve your vacuum’s cleaning power and extend its life.
Cleaning the brush roll and making small adjustments can solve many problems. Sometimes, the brush roll just needs a simple fix. Other times, you may need to replace it. Follow these steps to keep your vacuum running smoothly.
Removing Debris And Hair
Turn off and unplug the vacuum before starting. Flip it over to access the brush roll area. Use scissors or a knife to cut away hair and threads wrapped around the roll. Pull out any debris caught in the bristles. Clean both ends where the roll spins. This helps the brush roll move freely and work better.
Replacing The Brush Roll
If the brush roll is damaged or worn, replacement is best. Remove the screws or clips holding the brush guard in place. Lift out the old brush roll carefully. Insert the new brush roll, making sure it fits snugly. Replace the guard and tighten screws or clips. Test the vacuum to check the new brush roll spins correctly.
Adjusting Brush Height
Many vacuums have height settings for different floors. Check the brush height adjustment lever or dial. Set the brush to the right height for your floor type. Too low can damage carpets and the vacuum. Too high may reduce cleaning power. Proper height helps the brush roll pick up dirt well and prevents damage.
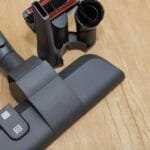
Clearing Hose And Attachments
Clearing the hose and attachments is a key step in fixing a vacuum cleaner. Dirt and debris often block these parts. This reduces suction power and cleaning efficiency. Regular checks keep your vacuum working well.
Cleaning hoses and attachments is simple. It saves money and extends the vacuum’s life. Follow these steps carefully for best results.
Detaching And Inspecting Hoses
Start by unplugging the vacuum. Remove the hose from the machine gently. Check the hose for cracks or holes. Look inside with a flashlight. Notice any dirt or objects stuck inside. Attachments also need a close look. Clear away any visible dust or hair.
Removing Clogs Safely
Use a long, flexible brush or a straight object. Push gently to avoid damage. Avoid sharp tools that can tear the hose. Try blowing air through the hose to clear loose dirt. If water is safe for your hose, rinse it carefully. Let it dry fully before reattaching to the vacuum.
Testing Airflow
Once clean, reconnect the hose and attachments. Turn on the vacuum and check suction strength. Feel airflow at the hose end. Weak airflow means more cleaning is needed. Repeat the cleaning steps if necessary. Proper airflow ensures better vacuum performance.
Addressing Electrical Issues
Electrical problems often stop vacuum cleaners from working. These issues can be simple or need part replacements. Knowing how to check electrical parts saves time and money. This guide shows how to find and fix common electrical faults safely and clearly.
Checking The Power Cord
Start by unplugging the vacuum cleaner. Look closely at the cord for cuts or worn spots. Move the cord gently to spot hidden damage. Use a multimeter to test if the cord has power. Replace the cord if it shows any breaks or no power flow.
Testing The Switch
The switch controls the vacuum’s power. Dirt or wear can cause it to fail. Remove the switch cover carefully. Use a multimeter to check if the switch works. Replace the switch if it does not turn the power on or off properly.
Replacing Fuses Or Motors
Fuses protect the vacuum from electrical surges. Check the fuse with a multimeter for continuity. Replace a blown fuse with the exact type and rating. If the motor does not run after fuse replacement, it may need a new motor. Test the motor’s electrical parts before replacing it.
Maintaining Your Vacuum Cleaner
Maintaining your vacuum cleaner keeps it working well longer. Simple care helps avoid big repairs and saves money. Clean parts and timely replacements make your vacuum efficient. Proper storage protects it from damage and dust. Follow these easy steps to keep your vacuum in top shape.
Regular Cleaning Schedule
Clean the vacuum after every use. Empty the dustbin or bag to prevent clogging. Wipe the filters with a damp cloth or replace them regularly. Check the brush roll for hair or debris and remove it. Keeping the vacuum clean improves suction power and air quality.
Replacing Parts On Time
Watch for worn belts and broken brushes. Replace them before they cause bigger problems. Use parts made for your vacuum model. Old filters reduce cleaning efficiency and can damage the motor. Timely replacements keep your vacuum running smoothly and quietly.
Storing Properly
Store the vacuum in a dry, cool place. Avoid places with extreme heat or moisture. Coil the cord loosely to prevent damage. Keep attachments together to avoid loss. Proper storage extends your vacuum’s life and keeps it ready for use.
Frequently Asked Questions
How Do I Fix A Vacuum Cleaner That Won’t Turn On?
Check the power cord and plug for damage. Ensure the outlet works. Inspect the vacuum’s power switch and internal fuse for faults.
Why Is My Vacuum Losing Suction Power Suddenly?
Clogged filters, full dust bags, or blocked hoses cause suction loss. Clean or replace filters and empty dust containers regularly.
How Can I Repair A Broken Vacuum Cleaner Belt?
Turn off and unplug the vacuum. Remove the brush roll cover. Replace the worn or broken belt with a new one.
What Causes A Vacuum Cleaner To Overheat Quickly?
Overheating happens due to blocked airflow or dirty filters. Clean all filters and remove debris from hoses to prevent damage.
Conclusion
Repairing your vacuum cleaner saves money and extends its life. Start with simple checks like cleaning filters and emptying bags. Tighten loose parts and replace worn belts carefully. Regular care keeps your vacuum working well longer. Small fixes often solve common problems fast.
Don’t ignore strange sounds or weak suction. Taking action early avoids costly repairs later. You can handle many repairs yourself with patience and care. Keep your home clean by keeping your vacuum in good shape.