Is your vacuum cleaner pipe clogged, cracked, or leaking air? When this happens, your vacuum won’t work properly, and cleaning becomes a frustrating chore.
But don’t worry—you don’t have to buy a new vacuum just yet. Fixing your vacuum cleaner pipe is easier than you think. You’ll discover simple, step-by-step methods to get your vacuum back to peak performance. Keep reading to save time, money, and avoid the hassle of a broken vacuum!

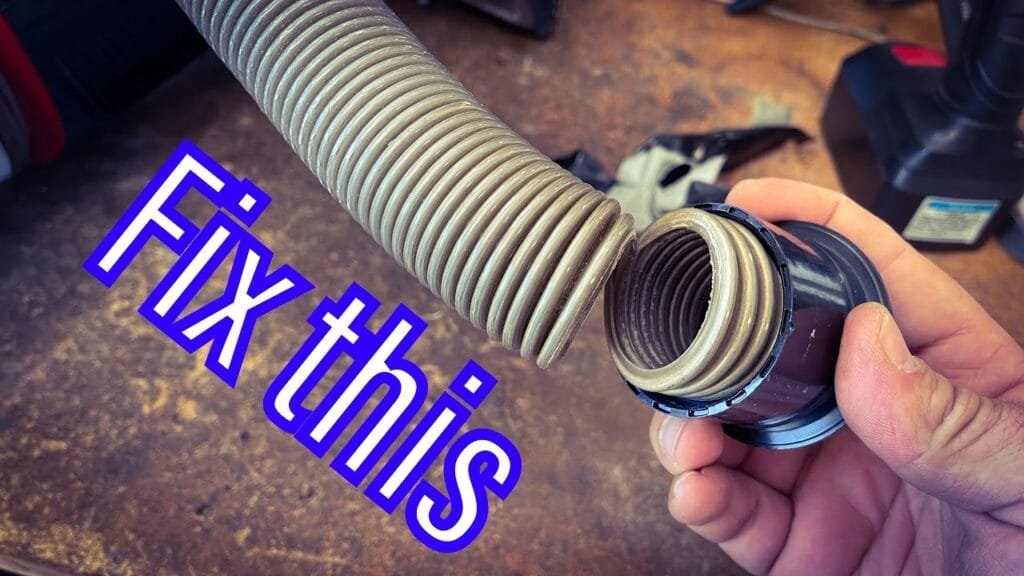
Credit: www.mistervac.com
Identify Pipe Issues
Identifying pipe issues is the first step to fix your vacuum cleaner. The pipe carries dirt and dust to the vacuum’s main body. Any problem here affects cleaning power.
Check the pipe closely for damage or blockages. Knowing the exact issue saves time and effort during repair.
Common Pipe Problems
Cracks and holes are common in vacuum pipes. These let air escape, lowering suction. Sometimes, pipes get bent or twisted. This blocks the airflow inside the pipe. Dirt or small objects can clog the pipe too. Pipes may also become loose from the vacuum parts. All these issues stop the vacuum from working well.
Signs Of Suction Loss
The vacuum does not pick up dirt well. Dust remains on the floor after cleaning. You hear strange noises from the pipe area. The vacuum feels lighter or weaker than usual. Air leaks or whistling sounds come from the pipe. These signs show the pipe might be damaged or blocked.
Credit: aussievac.com.au
Gather Repair Tools
Gathering the right tools is the first step to fix a vacuum cleaner pipe. Having the proper equipment makes the repair easier and faster. It helps avoid extra trips to the store and reduces frustration.
Prepare your workspace before starting. Clear a flat surface to place tools and parts. Organize everything so you can reach tools quickly. This saves time and keeps your repair process smooth.
Essential Tools Needed
Start with a basic toolkit. A screwdriver set is important for opening pipe connectors. Pliers help grip and twist tight parts. Scissors or a utility knife cut any damaged pipe sections. Tape, like duct tape or electrical tape, seals small holes or cracks. A replacement pipe section might be necessary for bigger damage. Have a cloth nearby to clean dirt and dust.
Safety Precautions
Turn off the vacuum and unplug it from the power source. This stops any risk of electric shock. Wear gloves to protect your hands from sharp edges. Work in a well-lit area to see small cracks or holes clearly. Avoid rushing to prevent accidents. Keep children and pets away from your workspace. Safety first ensures a smooth repair process without harm.
Detach And Inspect Pipe
Detaching and inspecting the vacuum cleaner pipe is a key step in fixing it. This process helps find blockages or damage inside the pipe. Cleaning or repairing the pipe can improve your vacuum’s performance. Follow clear steps to remove and check the pipe carefully.
Removing The Pipe
First, unplug the vacuum cleaner from the power source. Locate where the pipe connects to the vacuum unit. Gently twist or pull the pipe to detach it. Avoid using force to prevent breaking the pipe. Keep the pipe and connectors safe for reassembly.
Checking For Blockages And Damage
Look inside the pipe using a flashlight. Remove any dust, hair, or debris stuck inside. Use a flexible brush or a long stick to clear the blockage. Check the pipe for cracks, holes, or dents. Small cracks can cause loss of suction power. Replace the pipe if damage is severe. Clean the pipe thoroughly before putting it back.
Clear Blockages
Blocked vacuum cleaner pipes reduce suction power. Dirt and debris get stuck inside the pipe. Clearing these blockages restores your vacuum’s strength. It also helps your vacuum work longer without damage.
Using Compressed Air
Compressed air can push dirt out of the pipe. Use an air compressor or canned air spray. Insert the nozzle at one end of the pipe.
Turn on the air and blow through the pipe. Small particles will fly out the other side. Repeat several times for best results.
Wear safety glasses to protect your eyes. Keep the pipe steady to avoid damage. This method clears tight spots without tools.
Manual Removal Techniques
Manual removal works for large or stuck objects. Use a long, flexible brush or a straight wire.
Push the brush slowly through the pipe. Twist and pull to loosen dirt. Take care not to tear the pipe.
For tough clogs, use a bent wire hanger. Hook the clog and pull it out gently. After clearing, rinse the pipe with water and dry it.
Fix Pipe Cracks And Holes
Cracks and holes in your vacuum cleaner pipe reduce suction power. Air escapes through these gaps, making cleaning less effective. Fixing them restores proper airflow and improves vacuum performance. Small cracks need quick fixes to keep the vacuum working. Bigger holes require stronger, lasting repairs. Both methods save money and extend your vacuum’s life.
Temporary Sealing Methods
Use duct tape to cover small cracks or holes. Wrap the tape tightly around the damaged area. This blocks air leaks and lets you finish cleaning tasks. Another option is using silicone sealant. Apply a thin layer over the crack, then let it dry. It creates a flexible, water-resistant patch. Temporary fixes work well for quick repairs. They are easy and fast but may wear out soon.
Permanent Repair Options
For a lasting fix, replace the broken pipe section. Cut out the damaged part with scissors or a knife. Attach a new pipe piece using connectors made for vacuum hoses. Glue or clamp the joints for a tight seal. Another permanent fix is using epoxy putty. Mold the putty around the crack and let it harden. It forms a solid, durable patch. Permanent repairs restore full suction power and prevent future leaks.
Reassemble And Test
After fixing the vacuum cleaner pipe, the next step is to put it back together and check if it works well. This part is important to make sure the repair was successful. Take your time to reassemble the parts carefully. Then test the vacuum to see if the suction is strong again.
Reattaching The Pipe
Start by fitting the pipe back to the vacuum cleaner. Align the ends properly. Push the pipe firmly until it clicks or fits tight. Check for any gaps or loose parts. A loose pipe can cause air leaks and reduce suction. Use tape or clamps if needed to secure the pipe.
Checking Suction Performance
Turn on the vacuum cleaner after reassembling. Place your hand near the pipe opening. Feel for strong suction. If the suction feels weak, inspect for blockages or loose connections. Clean any dirt stuck inside the pipe. Repeat the test until the suction is good.
Prevent Future Issues
Preventing future problems with your vacuum cleaner pipe saves time and money. Small steps can keep your vacuum working well for years. Consistent care stops damage before it starts.
Follow easy habits to keep the pipe strong and clear. Avoid common mistakes that cause cracks or clogs. A little attention goes a long way in extending your vacuum’s life.
Regular Maintenance Tips
Check the vacuum pipe for cracks or holes often. Clean inside the pipe to remove dust and dirt. Use a soft brush or cloth to clear blockages. Replace worn-out parts quickly to avoid bigger problems. Store the pipe carefully to prevent bending or breaking. Tighten loose connections between the pipe and vacuum parts.
Proper Usage Practices
Do not pull the vacuum by the pipe. Avoid sucking up sharp or large objects that can damage the pipe. Use the right attachments for different surfaces. Keep the pipe dry to prevent mold and rust. Move the vacuum smoothly without twisting the pipe. Follow the manufacturer’s instructions for best use.
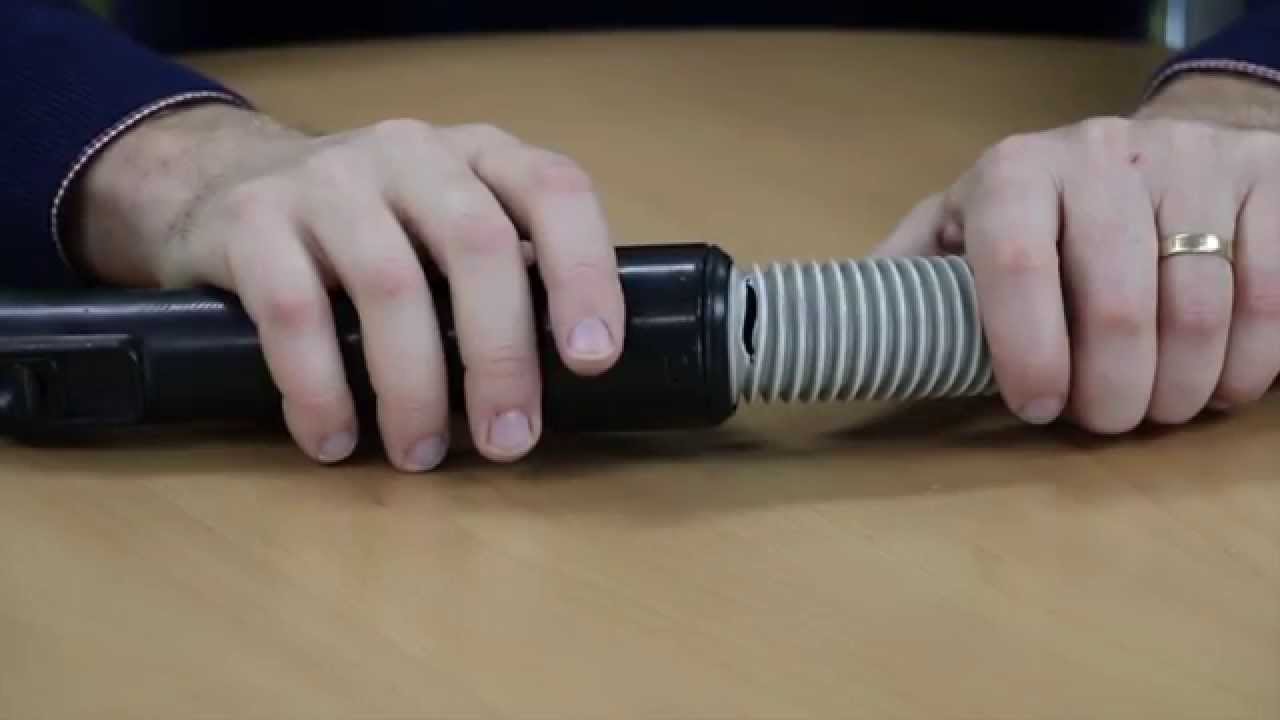
Credit: www.youtube.com
Frequently Asked Questions
How Do I Fix A Cracked Vacuum Cleaner Pipe?
To fix a cracked pipe, first clean the area around the crack. Use strong adhesive or duct tape to seal the crack. For severe damage, replace the pipe section for better suction and performance.
What Tools Are Needed To Repair Vacuum Pipes?
Common tools include scissors, duct tape, adhesive glue, and replacement pipe sections. A screwdriver may be needed to detach and reattach parts. These tools help secure and fix leaks effectively.
Can I Use Duct Tape To Fix Vacuum Pipe Leaks?
Yes, duct tape can temporarily seal small leaks in vacuum pipes. It stops air leaks and restores suction. However, for a long-term fix, consider using adhesive or pipe replacement.
How To Prevent Vacuum Cleaner Pipe Damage?
Avoid pulling the vacuum by the pipe and store it properly. Regularly inspect pipes for cracks or clogs. Proper care extends pipe life and maintains vacuum performance.
Conclusion
Fixing a vacuum cleaner pipe is easier than it seems. Check for cracks or clogs carefully. Use tape or glue for small breaks. Replace parts if damage is severe. Keep your vacuum pipe clean to avoid future problems. Regular checks help your vacuum work better.
A working pipe means better cleaning every time. Try these steps and enjoy a smoothly running vacuum. Simple fixes save money and time. Don’t let a broken pipe stop your cleaning. You can handle this repair with ease.