A damaged vacuum cord can be a hassle. But, you can fix it yourself.
Repairing a vacuum cord at home saves time and money. It might sound challenging, but it’s easier than you think. With the right tools and steps, you can restore your vacuum to its former glory. Whether the cord is frayed, cut, or just worn out, following a clear guide will make the repair process smooth.
In this guide, we’ll walk you through each step. You’ll learn how to handle the repair safely and effectively. So, let’s get started and bring your vacuum back to life with this step-by-step guide!

Credit: 757brick.com
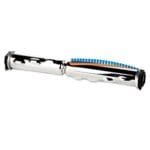
Tools Needed
Repairing a vacuum cord can seem intimidating at first. But, with the right tools, you can fix it easily. Below, you’ll find all the tools you need.
Essential Tools
These tools are crucial for any vacuum cord repair project. You cannot do the job without them.
- Screwdrivers: Phillips and flathead screwdrivers are essential. They help you open the vacuum casing.
- Wire cutters: Use these to cut the damaged section of the cord.
- Wire strippers: These are necessary to strip the insulation off the wires.
- Electrical tape: This tape insulates the repaired wires. It prevents electrical shorts.
- Replacement plug: Sometimes, you need a new plug for the cord. Ensure it matches the original.
Optional Tools
These tools can make the repair process easier. They are not necessary, but they help.
- Multimeter: This tool checks the electrical continuity. It ensures your repair is successful.
- Heat shrink tubing: This provides extra insulation. It also gives a clean finish.
- Pliers: Pliers help in gripping and twisting wires.
- Utility knife: Use this for precise cutting. It can be handy for stripping wire insulation.
- Zip ties: These keep the wires organized and secure.

Credit: www.youtube.com
Safety Precautions
Follow safety precautions to avoid electric shocks when repairing a vacuum cord. Unplug the vacuum before starting work. Use insulated tools and wear rubber gloves.
Repairing a vacuum cord can be a simple DIY task, but safety should always be your top priority. Neglecting basic safety precautions can result in electric shock or other injuries. Let’s make sure you stay safe while handling this repair.Turning Off Power
Before you begin, always turn off the power. Unplug the vacuum cleaner from the wall socket. This simple step can prevent electrical accidents.Double-check that the vacuum is not connected to any power source.Remember, even a small oversight can lead to serious injuries. Have you ever been zapped just by touching an outlet? Imagine that multiplied by the intensity of a vacuum’s motor.Protective Gear
Wear protective gear to keep yourself safe. Use insulated gloves to protect your hands from electrical shocks.Safety glasses are also a good idea to protect your eyes from any flying debris or loose wires.Have you ever wondered why electricians always wear gloves? It’s not just for show—those gloves can be lifesavers.A simple pair of gloves and glasses can make a world of difference.By taking these precautions, you ensure that your DIY project is both safe and successful. What other safety tips do you follow when working with electrical appliances?Remember, a few minutes spent on safety can save you from a lot of trouble later on.Inspecting The Cord
Learn how to inspect the cord for DIY vacuum repair. Check for frays, splits, or exposed wires carefully. Ensure your vacuum works safely and efficiently.
Inspecting the CordBefore you start repairing your vacuum cord, the first step is to inspect it thoroughly. This ensures you know exactly where the problem lies. Trust me, this step saves you from unnecessary hassle later on.Checking For Damage
Begin by examining the entire length of the cord. Look for any visible cuts, cracks, or worn-out sections. These are often the culprits causing your vacuum to underperform.Run your fingers along the cord to feel for any inconsistencies. If you notice any rough or uneven areas, mark them with a piece of tape or a marker. This will help you focus on specific problem spots later.Have you ever stepped on your vacuum cord while cleaning? That could be one reason the cord is damaged. Think back to any incidents that might have caused wear and tear.Identifying Problem Areas
Once you have a general idea of where the damage is, it’s time to identify the exact problem areas. Plug in your vacuum and turn it on. Gently wiggle the cord at different sections to see if the vacuum turns off or loses power.If the vacuum stops working when you move a certain part of the cord, that’s a clear indication of a problem spot. Make a note of these areas.Sometimes, the issue isn’t visible. You might need to feel the cord for internal breaks. Pay special attention to the sections near the plug and the vacuum entry point, as these areas are more prone to damage.By now, you should have a clear picture of where the cord needs repair. Ready to roll up your sleeves and fix it? Let’s move on to the next steps!Preparing The Cord
Before you start fixing your vacuum cord, you need to prepare it. This step is crucial for a smooth and successful repair. It ensures safety and makes the process easier. Let’s break down the steps involved in preparing the cord.
Cleaning The Area
First, unplug your vacuum cleaner. Safety comes first. Next, clean the area around the damaged part. Use a soft cloth to remove dust and dirt. A clean workspace helps you see the damage clearly. It also prevents dirt from getting into the cord during repair.
Gathering Materials
Now, gather all the materials you need. This includes a new cord, wire cutters, electrical tape, and a screwdriver. Having everything ready saves time. It also ensures you don’t have to stop in the middle of the repair. Being prepared is half the battle won.
Repairing Minor Cuts
Minor cuts on your vacuum cord can be annoying. They can also be dangerous. But you don’t always need a professional to fix them. With some simple tools, you can repair these cuts yourself. Follow this step-by-step guide to get your vacuum working safely again.
Using Electrical Tape
First, unplug your vacuum. Safety first! Inspect the cut area on the cord. Make sure the wires are not exposed. If the wires are exposed, do not proceed with this method. Use a different repair method or consult a professional.
If the cut is minor and the wires are not exposed, you can use electrical tape. Wrap the tape tightly around the damaged area. Ensure the tape covers the cut completely. Overlap the tape for better coverage and strength. This will protect the cord from further damage and keep it safe to use.
Applying Heat Shrink Tubing
Heat shrink tubing is another effective way to repair minor cuts. First, unplug your vacuum. Safety comes first! Measure the length of the damaged area. Cut a piece of heat shrink tubing slightly longer than the cut.
Slide the tubing over the cut area. Make sure it covers the cut completely. Use a heat gun or a hairdryer to shrink the tubing. Apply heat evenly around the tubing. The tubing will shrink and form a tight seal around the cord. This method provides a more durable repair than electrical tape.
Both methods can extend the life of your vacuum cord. Choose the one that best suits the damage. Always prioritize safety in your DIY repairs.
Fixing Severe Damage
So, you’ve discovered severe damage to your vacuum cord. Don’t worry, it’s a fixable problem. By following a few steps, you can have your vacuum running like new again.
First, make sure to unplug your vacuum. Safety should always come first. Now, let’s dive into the repair process.
Cutting Out Damaged Section
Begin by locating the damaged section of the cord. You might notice frayed wires, exposed copper, or severe cuts. These are clear signs that the section needs to be removed.
Use a sharp pair of wire cutters to cut out the damaged part. Be precise and ensure you’re cutting cleanly through the wire. This will make the next steps easier.
Once the damaged section is cut out, you’ll have two ends of the cord. Strip about half an inch of insulation from each end. This will expose the wires inside and prepare them for the next step.
Splicing New Wire
Now that the damaged part is removed, it’s time to splice in a new piece of wire. Make sure the new wire matches the gauge of your vacuum cord. This ensures proper electrical flow and safety.
Twist the exposed wires of the new wire and the cord ends together. You want a secure connection to avoid any future issues. Use wire nuts to cover the twisted wires and prevent them from coming apart.
Wrap the spliced area with electrical tape. This provides additional insulation and protection. Make sure the tape covers the entire spliced area to avoid any exposure.
Have you ever thought about how a small fix can save you from buying a new appliance? It’s empowering to know you can handle such repairs yourself.
Finally, test your vacuum to ensure the repair was successful. Plug it in and see if it powers on without any issues. If it does, you’ve done a great job!
Did you find this guide helpful? What other DIY repairs have you tackled successfully? Share your experiences and tips with us!
Testing The Repair
After repairing your vacuum cord, it’s time to test the fix. This step ensures your vacuum works safely and effectively. Follow these steps to test your repair.
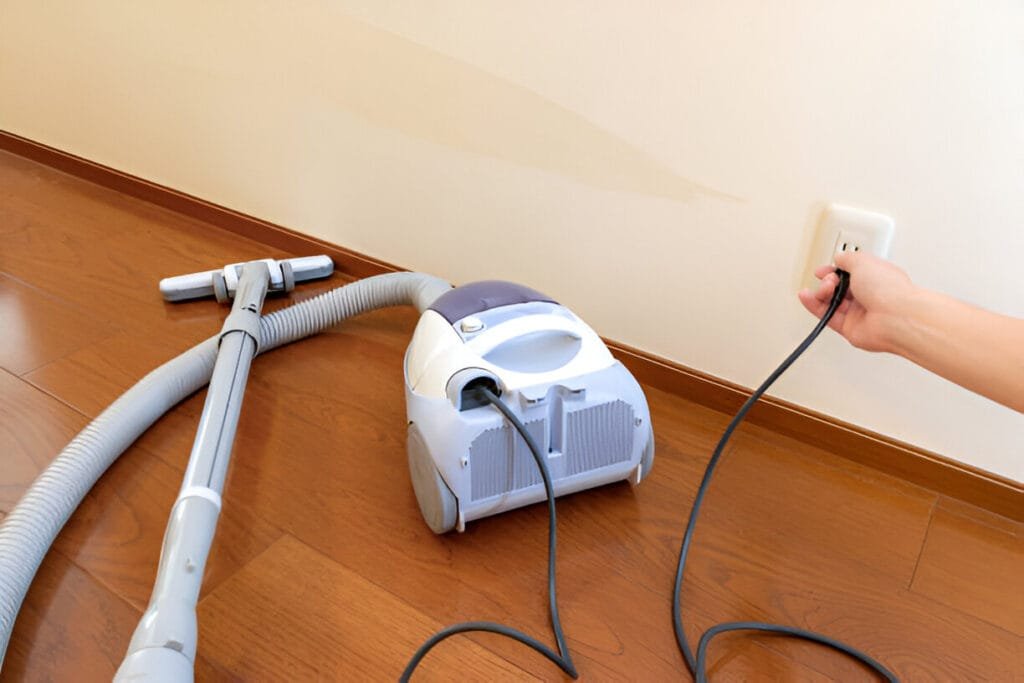
Reconnecting Power
First, plug the vacuum into a power outlet. Double-check that the plug fits securely into the socket. Make sure there are no exposed wires. The plug should feel firm and stable.
Checking Functionality
Turn on the vacuum. Listen for normal operating sounds. The motor should start smoothly and run without unusual noises. If the vacuum doesn’t start, recheck your connections.
Next, test the suction. Move the vacuum over a small area of carpet. Ensure it picks up debris effectively. Pay attention to the power cord. Look for any signs of strain or overheating. The cord should remain cool and flexible.
Finally, unplug the vacuum and inspect the cord again. Verify there are no visible damages. A successful repair will pass all these checks, ensuring your vacuum is safe and functional.

Credit: www.amazon.com
Preventing Future Damage
Repairing a vacuum cord yourself can prevent future damage and save money. Follow this step-by-step guide for a quick fix. Your vacuum will be back in action in no time.
Preventing future damage to your vacuum cord is crucial to extending the lifespan of your appliance and ensuring it functions properly. By adopting proper storage habits and regular maintenance routines, you can minimize wear and tear. These simple steps can save you time, money, and frustration in the long run.Proper Storage
Storing your vacuum correctly can make a significant difference. Always wind the cord carefully, avoiding tight coils that can cause breakage. Use the built-in cord storage hooks if your vacuum has them.Keep your vacuum in a dry, cool place to prevent the cord from becoming brittle. Avoid placing heavy items on the cord or leaving it where it can be tripped over. These small actions can prevent unnecessary damage.Regular Maintenance
Regularly inspecting your vacuum cord can help you catch issues early. Check for fraying, cuts, or other signs of wear. Addressing these problems immediately can prevent more significant damage.Clean the cord periodically to remove dust and debris. Use a damp cloth to wipe it down gently, ensuring it stays flexible and free from grime. Regular maintenance helps ensure your vacuum continues to work efficiently.Have you ever noticed how much smoother everything runs with a bit of regular upkeep? These small, consistent efforts can keep your vacuum in top shape.By following these practical tips, you’ll keep your vacuum cord in great condition and avoid unnecessary repairs. Have you thought about how much easier your cleaning routine will be with a well-maintained vacuum? Try these steps and see the difference for yourself.Frequently Asked Questions
How To Fix A Damaged Vacuum Cord?
Unplug the vacuum. Cut the damaged section of the cord. Strip the wire ends. Connect new plug or extension using wire connectors. Secure with electrical tape.
Can You Rewire A Vacuum Cleaner?
Yes, you can rewire a vacuum cleaner. Ensure it is unplugged first. Follow a wiring diagram and use proper tools. If unsure, consult a professional.
Can You Replace A Chewed Vacuum Cord?
Yes, you can replace a chewed vacuum cord. Ensure the vacuum is unplugged before starting. Buy a compatible replacement cord and follow safety guidelines. If unsure, consult a professional.
How To Replace The Plug On A Cord?
To replace a plug on a cord, first unplug it. Cut off the old plug. Strip the wire ends. Connect the wires to the new plug. Securely tighten the screws. Test the new plug to ensure it works properly.
Conclusion
Repairing your vacuum cord is simple with this guide. Follow each step carefully. Ensure your tools are ready and safety is a priority. It’s satisfying to fix things yourself. You save money and learn new skills. Remember to test the cord after repairs.
A working vacuum makes cleaning easier. Share your success with friends. Repairing your vacuum cord can be a rewarding experience. Happy repairing!