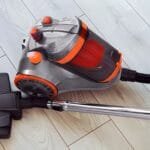
If your Shark vacuum isn’t picking up like it used to, it might be time for a deep clean. Keeping your vacuum in top shape ensures it works efficiently and lasts longer.
But cleaning it can feel tricky if you’re not sure where to start. Don’t worry—you’re about to learn simple, step-by-step ways to get your Shark vacuum sparkling clean again. By the end of this guide, you’ll know exactly how to maintain your vacuum so it always performs at its best.
Ready to make your cleaning routine easier and more effective? Let’s dive in!
Prepare Your Shark Vacuum
Preparing your Shark vacuum is the first step to effective cleaning. It helps you reach all parts and keeps the vacuum working well. Taking time to prepare makes the cleaning process smooth and safe.
Follow these simple steps before you start cleaning. This way, you avoid damage and get the best results from your vacuum.
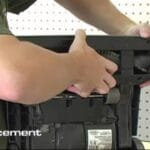
Unplug And Disassemble
Always unplug the vacuum before cleaning. This stops any chance of electric shock. Next, remove the dust cup and filter. Take off the brush roll if your model allows. Check the user manual for parts you can safely remove. Keep all parts in a clean space to avoid losing them.
Gather Cleaning Supplies
Collect basic cleaning tools. Use a soft cloth for wiping surfaces. A small brush helps clear dust from tight spots. Have warm water and mild soap ready for washable parts. Avoid harsh chemicals that might damage the vacuum. Prepare a dry towel to dry parts after washing.
Empty And Clean The Dust Bin
Cleaning the dust bin is a key step to keep your Shark vacuum working well. A full or dirty dust bin lowers suction power. Regular emptying and cleaning help the vacuum pick up dirt better. This process is simple and quick. It keeps your vacuum fresh and ready for the next clean.
Remove Dust Bin
First, turn off the vacuum and unplug it. Find the dust bin release button or latch. Press or pull it to detach the dust bin from the vacuum. Hold the dust bin over a trash can. Open the bottom lid or hatch to empty the dirt and debris. Tap gently to remove stuck particles. Avoid using sharp objects to clean the bin.
Wash And Dry Properly
Rinse the dust bin with warm water to remove fine dust. Use mild soap if needed. Do not use harsh chemicals or abrasive scrubbers. Clean the filter separately if your model allows it. After washing, shake off excess water. Let the dust bin air dry completely before reattaching it. A dry dust bin prevents mold and keeps the vacuum working well.
Clean The Filters
Cleaning the filters of your Shark vacuum keeps it working well. Filters catch dust and small dirt pieces. Over time, these filters get full and block airflow. This lowers the vacuum’s power. Regular cleaning helps your vacuum last longer and clean better.
Locate Filters
Start by finding the filters in your Shark vacuum. Most models have two filters. One is near the dust cup, and the other is inside the vacuum body. Check your user manual for exact filter locations. Remove both filters carefully before cleaning.
Rinse And Air Dry
Rinse the filters under cold water only. Do not use soap or detergent. Gently run water until it runs clear. Shake off extra water. Let the filters dry completely in open air. Do not put them in the sun or use a dryer. Drying may take 24 hours or more.
Replace When Needed
Inspect the filters after cleaning. If they are torn, stiff, or very dirty, replace them. Using damaged filters can harm the vacuum. Buy genuine Shark replacement filters for best results. Change filters every 3 to 6 months for strong suction.
Clear The Brush Roll
The brush roll is a key part of your Shark vacuum. It picks up dirt, hair, and dust from the floor. Over time, the brush roll can get tangled and clogged. Clearing it often keeps your vacuum working well. This section explains how to clear the brush roll step by step.
Remove Debris And Hair
First, unplug your vacuum for safety. Turn the vacuum over to see the brush roll. Use scissors or your fingers to cut and pull off hair and threads. Remove small debris stuck between bristles. Keep cleaning until the brush looks clear. This step helps the brush roll spin freely and clean better.
Check For Damage
Look closely at the brush roll after cleaning. Check if the bristles are worn out or bent. Look for cracks or breaks on the roll itself. Replace the brush roll if you see serious damage. A damaged brush roll can hurt your vacuum’s performance. Regular checks extend your vacuum’s life.
Wipe Down The Exterior
Keeping your Shark vacuum clean helps it work better and last longer. Wiping down the exterior removes dust and dirt. This simple step makes your vacuum look new and fresh. It also stops grime from building up on the surface. Clean parts mean the vacuum runs smoothly every time you use it.
Use A Damp Cloth
Take a soft cloth and dampen it with water. Wipe all outside surfaces gently. Avoid using too much water to protect the electronics. Focus on areas with visible dirt or stains. Dry the vacuum with a dry cloth after wiping. This method keeps the vacuum safe and clean.
Clean Attachments
Remove all attachments from the vacuum. Wipe each piece with a damp cloth. Pay attention to small crevices where dust hides. Let attachments dry completely before reattaching. Clean attachments improve suction and overall cleaning power.
Reassemble And Test
After cleaning the Shark vacuum parts, it is time to put everything back together. This step is important to make sure the vacuum works properly. Careful reassembly keeps the vacuum safe and efficient. Follow each step to avoid mistakes.
Put Parts Back Together
Start with the filter. Place it firmly in its slot. Next, attach the dustbin or dirt cup. Make sure it clicks into place. Then, reattach the brush roll and any covers. Check that all parts fit tightly. Loose parts can cause the vacuum to break or lose suction.
Run A Quick Test
Plug in the vacuum and turn it on. Listen for any unusual sounds. Check if the brush roll spins freely. Watch for strong suction at the nozzle. Test the vacuum on a small area. This confirms the vacuum works well. Stop the vacuum if anything feels wrong. Fix the issue before full use.
Maintenance Tips
Keeping your Shark vacuum clean helps it work well for a long time. Simple maintenance stops dirt from building up. It also stops parts from breaking. Follow easy steps to keep your vacuum in top shape.
Small habits make a big difference. Regular care saves time and money later. Here are key tips to maintain your Shark vacuum.
Regular Cleaning Schedule
Check the vacuum after each use. Empty the dustbin to avoid clogs. Clean the filters every month to keep suction strong. Remove hair and threads from the brush roll. Wipe the vacuum body with a damp cloth. This stops dust from settling on parts.
Store Properly
Keep your vacuum in a dry place. Avoid damp areas to stop mold and rust. Store it upright to protect the brush roll. Use the charging dock if your model has one. Keep cords untangled to prevent damage. Proper storage keeps your vacuum ready for use.
Frequently Asked Questions
How Often Should I Clean My Shark Vacuum?
Clean your Shark vacuum after every 1-2 uses. Regular cleaning prevents clogs and maintains suction power. This keeps your vacuum efficient and prolongs its lifespan.
What Parts Of Shark Vacuum Need Cleaning?
Focus on the dustbin, filters, brushroll, and hose. Clean the dustbin and filters weekly. Remove hair and debris from the brushroll to avoid blockages.
Can I Use Water To Clean Shark Vacuum Filters?
Yes, rinse washable filters with cold water only. Do not use soap or detergent. Let filters air dry completely before reinstalling to prevent damage.
How Do I Unclog A Shark Vacuum Hose?
Detach the hose and gently remove visible debris. Use a long, flexible brush or compressed air to clear blockages. Reattach securely before use.
Conclusion
Cleaning your Shark vacuum keeps it working well for longer. Regular care stops dirt from building up inside. You save money by avoiding repairs or replacements. Simple steps like emptying the bin and washing filters help a lot. Check brushes and nozzles for hair or dust.
A clean vacuum cleans your home better and faster. Keep a routine to enjoy fresh, clean floors every day. Easy maintenance makes your cleaning routine smooth and less tiring. Small effort, big results.