If your Kirby vacuum isn’t picking up like it used to, the problem might be a worn-out belt. Knowing how to put a belt on a Kirby vacuum can save you time and money.
In this guide, you’ll find simple, clear steps to replace the belt quickly and get your vacuum working like new again. Keep reading to learn how easy it is to fix this common issue yourself.
Prepare Your Workspace
Clear a flat surface to work on and gather all needed tools before starting. Make sure the vacuum is unplugged to stay safe. Organizing parts nearby helps the process go smoothly.
Gather Necessary Tools
Start by collecting all tools you need. A screwdriver and a new belt are essential. Keep a clean cloth nearby to wipe dust. Having everything ready saves time and frustration. Organize tools in one spot before starting.
Unplug The Vacuum
Always unplug the Kirby vacuum before work. This step prevents electric shock or accidents. Safety is the top priority. Double-check the cord is disconnected from the outlet. Never attempt repairs while the vacuum is plugged in.
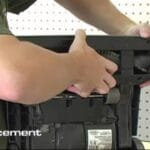
Access The Belt Area
Accessing the belt area is the first step to put a new belt on your Kirby vacuum. This section shows you how to open the vacuum and find the belt. Follow these simple steps to get to the parts you need to work on. It helps you see the belt and brush roll clearly.
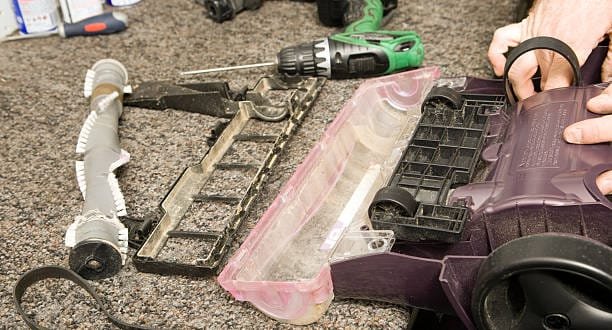
Remove The Bottom Plate
Turn the vacuum upside down on a flat surface. Find the screws holding the bottom plate. Use a screwdriver to remove all screws carefully. Lift off the bottom plate gently. Set the plate and screws aside where you can find them easily.
Locate The Brush Roll
Look inside the open area after removing the plate. The brush roll is a long cylinder with bristles. It sits across the vacuum’s base. The belt wraps around one end of the brush roll. Knowing this helps you place the new belt correctly.
Remove The Old Belt
Removing the old belt from a Kirby vacuum is the first step to keep it working well. This part wears out after a while and must be replaced to keep the vacuum cleaning properly. The process is simple and takes only a few minutes.
Start by opening the vacuum’s bottom plate to reach the belt and brush roll. Handle the parts gently to avoid damage. Clear access helps in taking off the old belt quickly.
Detach The Brush Roll
Locate the brush roll inside the vacuum base. It usually sits across the width of the vacuum head. Carefully lift or unlock the brush roll from its holder. Some models have clips or screws that you need to remove first.
Once loose, slide the brush roll out slowly. Watch for any debris or hair wrapped around it. Removing the brush roll gives clear access to the belt underneath.
Slide Off The Worn Belt
The old belt wraps around the brush roll and motor shaft. Gently pull the belt off the motor shaft first. Then, slide it off the brush roll completely. If the belt is tight, stretch it lightly to remove it without damage.
Check the belt for cracks or breaks. A worn belt can cause poor vacuum performance. Remove all pieces before installing the new belt. This keeps the vacuum running smoothly.
Install The New Belt
Installing the new belt on your Kirby vacuum is a key step to keep it working well. A fresh belt helps the brush roll spin smoothly. This improves cleaning and stops the vacuum from making strange noises. Follow these easy steps to place the belt correctly.
Position The Belt On The Motor Shaft
Start by finding the motor shaft inside the vacuum. This is where the belt will sit first. Hold the belt and stretch it gently over the motor shaft. Make sure it fits snugly and does not slip off. A tight fit here is important for good performance.
Fit The Belt Around The Brush Roll
Next, take the belt and pull it around the brush roll. The brush roll is the spinning part that cleans the carpet. Slide the belt over the end of the brush roll carefully. Check that the belt is straight and not twisted. A properly placed belt helps the brush roll turn evenly.
Reassemble The Vacuum
After placing the new belt on your Kirby vacuum, it is time to put the vacuum back together. Reassembling the vacuum carefully ensures it works properly. Follow these steps to secure the parts and finish the job.
Secure The Brush Roll Back
Place the brush roll into its slot carefully. Make sure the belt fits around the brush roll. Push the brush roll until it clicks into place. Check that it spins freely with the belt on. This step is key for good cleaning performance.
Attach The Bottom Plate
Align the bottom plate with the vacuum base. Press it firmly so it fits snugly. Use the screws you removed before to tighten it. Do not leave screws loose or missing. The bottom plate holds everything securely together.
Test The Vacuum
Testing the vacuum after putting on a new belt is important. It shows if the belt fits and works well. This step helps avoid damage and keeps the vacuum running smoothly.
Plug In And Turn On
First, plug the vacuum into a power outlet. Make sure the cord is secure and not tangled. Next, switch on the vacuum. Listen to the sound carefully. A smooth, steady noise means the belt is likely working. If the vacuum sounds strange or stops, the belt may be loose or broken.
Check Belt Operation
Look under the vacuum to watch the brush roll spin. It should turn quickly and evenly. If it does not move or spins slowly, the belt might be too tight or too loose. Turn off the vacuum and unplug it before adjusting the belt again. Proper belt operation ensures your Kirby cleans well and lasts longer.
Maintenance Tips
Keeping your Kirby vacuum running smoothly means regular care. The belt plays a key role in the vacuum’s performance. Small checks can prevent big problems later. Follow these tips to maintain your vacuum belt properly.
Regular Belt Inspection
Check the belt every few weeks. Look for cracks, tears, or signs of wear. A worn belt can slip or break during use. Make sure the belt is tight and fits well. Clean any dirt or hair wrapped around the belt. This helps the vacuum work better and last longer.
When To Replace The Belt
Replace the belt if it looks stretched or damaged. If the vacuum brush stops spinning, the belt might be loose or broken. Change the belt right away to avoid damage. Use only belts made for Kirby vacuums. A new belt keeps your vacuum cleaning at its best.
Frequently Asked Questions
How Do I Replace The Belt On A Kirby Vacuum?
To replace the belt, unplug the vacuum first. Remove the bottom plate, take off the old belt, loop the new belt around the motor shaft and brush roll, then reattach the bottom plate securely.
What Tools Are Needed To Put A Belt On Kirby Vacuum?
You typically need a screwdriver to remove the vacuum’s bottom plate. No special tools are required to install the belt itself, making the process simple and quick.
How Often Should I Change Kirby Vacuum Belts?
Change the belt every 6 to 12 months or if it looks worn or broken. Regular replacement ensures optimal vacuum performance and prevents brush roll damage.
Can I Use Any Belt For My Kirby Vacuum?
Use only belts designed for your specific Kirby model. Generic belts may not fit properly and can damage the vacuum or reduce cleaning efficiency.
Conclusion
Changing the belt on your Kirby vacuum keeps it working well. A tight, well-placed belt helps the brush roll spin properly. This stops dirt from staying on your floors. Follow the steps carefully to avoid any mistakes. Regular checks save you from bigger problems later.
Now, your vacuum can clean better and last longer. Simple care makes a big difference every day. Keep your home fresh and dust-free with ease.