If your Shark vacuum isn’t working as well as it used to, taking it apart might be the quickest way to fix the problem. You don’t need to be a tech expert or spend money on repairs.
By learning how to disassemble your Shark vacuum, you can clean stuck parts, replace broken pieces, and keep it running like new. In this guide, you’ll find simple, step-by-step instructions that anyone can follow. Ready to save time and money?
Let’s dive in and get your vacuum back to peak performance.
Prepare For Disassembly
Preparing your Shark vacuum for disassembly is an important first step. It helps keep the process safe and smooth. Taking time to prepare also protects the vacuum parts from damage.
Start with a clear workspace. Make sure you have enough light and space to work comfortably. This preparation helps you avoid losing small parts during disassembly.
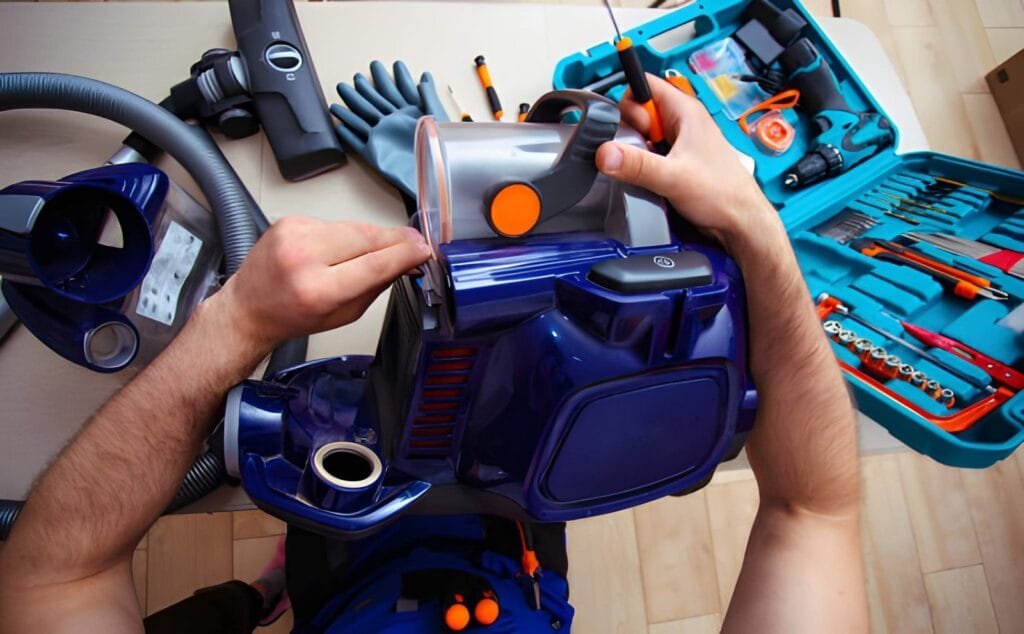
Gather Necessary Tools
Collect all tools before starting. You may need screwdrivers, pliers, or a small brush. Having these tools ready saves time and effort. Check your vacuum manual for specific tool requirements. Use tools that fit screws well to avoid stripping them.
Unplug And Clean Vacuum
Always unplug the vacuum before disassembling. This prevents electrical shock and injury. Next, clean the vacuum exterior and remove dust. Empty the dustbin or bag completely. Cleaning first stops dirt from spreading during disassembly. It also makes parts easier to handle and inspect.
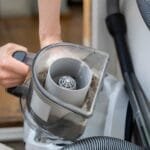
Remove Dust Canister
Removing the dust canister from your Shark vacuum is the first step in cleaning or maintenance. This part holds all the dirt and debris collected during vacuuming. Emptying it regularly keeps your vacuum working well and improves air quality in your home.
Locate Release Button
Find the release button on the vacuum’s dust canister. It is usually near the handle or top of the canister. Pressing this button unlocks the canister from the vacuum body. The button is designed for easy access and quick removal.
Detach Canister Safely
Hold the canister firmly after pressing the release button. Pull it straight out to avoid spilling dust. Keep the canister upright to prevent mess. Set it on a surface that is easy to clean. This careful removal protects both your vacuum and your space.
Detach Filters
Detaching filters is a key step in disassembling your Shark vacuum. Filters catch dust and dirt, so cleaning or replacing them keeps your vacuum working well. This part is simple but important for good suction and air quality.
Find Filter Locations
Shark vacuums usually have two main filters. One is near the dust cup. The other is inside the vacuum body. Check your model’s manual for exact spots. Most filters are easy to spot and remove.
Remove And Inspect Filters
Press the release button or twist the filter to take it out. Look for dust, hair, or blockages on the filters. Rinse washable filters under cold water. Let them dry completely before putting them back. Replace filters that are torn or very dirty.
Separate Brush Roll
Separating the brush roll is a key step in cleaning or fixing your Shark vacuum. It helps remove hair, dust, and debris stuck around the brush. This keeps the vacuum running smoothly and extends its life. Follow simple steps to access and take out the brush roll safely.
Access Brush Compartment
First, unplug the vacuum for safety. Lay the vacuum on a flat surface with the bottom facing up. Look for the brush compartment cover. Most Shark models have a latch or screws holding it. Use a screwdriver if needed to open the cover. Gently remove the cover to reveal the brush roll inside.
Remove Brush Roll
Once the brush roll is visible, check for any clips or caps on the ends. Press or twist these parts carefully to release the brush roll. Slide the brush roll out slowly to avoid damage. Clean off any hair or dirt wrapped around it. Keep the brush roll safe if you plan to reuse it.
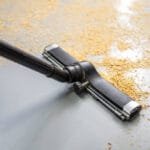
Disassemble Hose And Attachments
Disassembling the hose and attachments of your Shark vacuum is simple. This process helps with cleaning and maintenance. It also makes storage easier.
Follow these steps carefully to avoid damage. Use gentle force and check parts for clips or buttons.
Unlock Hose From Body
Find the connection point between the hose and vacuum body. Look for a release button or tab near the joint. Press or squeeze this button while pulling the hose gently. The hose should detach smoothly. Do not twist or yank hard to avoid breaking the connector.
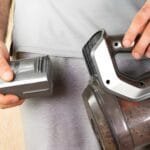
Detach Additional Tools
Most Shark vacuums have extra tools attached to the hose or wand. These tools usually snap on with clips or slide into place. Press the clip or pull the tool straight off. Keep tools organized to avoid losing small parts. Clean each tool separately before reattaching.
Access Internal Components
Start by removing screws to open the vacuum’s outer shell. Gently lift parts to reach filters, belts, and brush rolls inside. Careful handling helps avoid damage while accessing internal components.
Unscrew Outer Shell
Start by placing your Shark vacuum on a flat surface. Use a screwdriver to remove all screws on the outer shell. Keep the screws safe to avoid losing them. Gently lift the shell off to reveal the inside parts. Avoid forcing the shell to prevent damage.
Handle Electrical Parts Carefully
Inside, you will see wires and connectors. Touch these parts with care to avoid breaks or shorts. Use gloves if possible to keep parts clean. Avoid pulling on wires; instead, gently disconnect connectors. This protects the vacuum and ensures safety.
Clean And Maintain Parts
Cleaning and maintaining the parts of your Shark vacuum is key to keeping it working well. Dirt and dust can build up quickly. This can block airflow and reduce suction power. Regular care helps the vacuum last longer and clean better. Focus on the filters, canister, and brushes. These parts gather the most dirt and need attention often.
Wash Filters And Canister
Remove the filters carefully from the vacuum. Rinse them under cool water. Do not use soap or cleaning agents. Let the filters air dry completely before putting them back. Wet filters can damage your vacuum.
Empty the canister into the trash. Wipe the inside with a damp cloth. Remove any sticky dirt or dust. Rinse the canister with water if needed. Make sure it is dry before reattaching it to the vacuum.
Remove Debris From Brushes
Turn the vacuum over to access the brush roll. Use scissors or your fingers to pull out hair and threads. Clear all debris wrapped around the brush. Check the brush ends and remove trapped dust. Clean brushes spin freely for better dirt pickup.
Brushes clogged with debris strain the motor. Clean brushes help your vacuum pick up more dirt quickly. Check the brushes regularly for best results.
Reassemble Vacuum
Reassembling your Shark vacuum is a simple process that brings your device back to life. Follow each step carefully to ensure everything fits perfectly. Take your time and avoid forcing parts together.
Reattach Internal Components
Begin by placing all internal parts back in their original spots. Align the motor and wiring carefully. Make sure no wires are pinched or out of place. Secure clips or screws that hold these parts firmly. Check that moving parts spin freely without obstruction.
Secure Outer Shell
Place the vacuum’s outer shell back over the internal components. Match all edges and screw holes precisely. Use the correct screws to fasten the shell tightly. Avoid overtightening, which might crack the plastic. Confirm the shell sits flush with no gaps.
Insert Filters And Canister
Slide the filters into their designated slots carefully. Check that each filter fits snugly without bending. Reinstall the dust canister by aligning it properly. Lock it into place until you hear a click. This step ensures your vacuum cleans effectively again.
Test Vacuum Functionality
Testing your Shark vacuum’s functionality ensures it works properly after disassembly. Check suction power and motor sound for any issues. This step helps confirm that all parts are correctly reassembled and the vacuum runs smoothly.
Plug In And Power On
Start by plugging the vacuum into a power outlet. Make sure the cord is secure and not damaged. Press the power button to turn the vacuum on. Listen for the motor sound. This shows the vacuum is receiving power.
If the vacuum does not turn on, check the outlet with another device. Also, inspect the vacuum’s power switch for issues. A non-working vacuum needs further inspection before disassembly.
Check For Proper Operation
Observe the vacuum’s suction while it runs. Use your hand near the nozzle to feel the airflow. The suction should be strong and steady. Weak suction may indicate a clog or dirty filter.
Listen for unusual noises like grinding or rattling. These sounds can signal mechanical problems. The brush roll should spin freely without obstruction. Note any issues before taking the vacuum apart.
Testing the vacuum helps identify problems early. This step saves time and prevents damage during disassembly.
Frequently Asked Questions
How Do I Safely Disassemble A Shark Vacuum?
Unplug the vacuum before disassembly. Remove attachments and empty the dust cup. Follow the user manual for step-by-step parts removal to avoid damage.
What Tools Are Needed To Disassemble Shark Vacuum?
Typically, you need a screwdriver and possibly pliers. Check your vacuum model’s manual for specific tools. Avoid using excessive force to prevent breaking parts.
How Can I Clean Shark Vacuum Parts After Disassembly?
Use a damp cloth or mild detergent to clean filters, dust cups, and brushes. Avoid soaking electrical components. Let parts dry completely before reassembly.
How Often Should I Disassemble My Shark Vacuum?
Disassemble and clean your vacuum every 1 to 3 months. Frequent cleaning improves suction and extends the vacuum’s lifespan. Adjust frequency based on usage.
Conclusion
Disassembling your Shark vacuum can save time and money. Follow each step carefully and stay organized. Keep small parts safe to avoid losing them. Clean or replace parts as needed for better performance. Regular maintenance helps your vacuum last longer.
Practice patience; the process becomes easier with experience. Now, you can handle basic repairs and keep your vacuum working well.