A clogged vacuum hose can be frustrating. It reduces your vacuum’s efficiency.
If your vacuum isn’t working well, the hose might be blocked. This guide will help you fix it. Unclogging a vacuum hose is easier than you think. You don’t need special tools. Just follow some simple steps. In this guide, we will walk you through the process.
By the end, your vacuum will work like new. Keep reading to learn how to clear that clog and get your vacuum running smoothly again.
Introduction To Unclogging A Vacuum Hose
Unclogging a vacuum hose might sound daunting, but it’s simpler than you think. It’s a task many avoid, yet it’s essential for maintaining an efficient vacuum cleaner. Let’s dive into why vacuum hoses get clogged and why regular maintenance is crucial.
Why Vacuum Hoses Get Clogged
Vacuum hoses often get clogged due to debris like hair, dust, and small objects. These items can accumulate over time, blocking the airflow. Have you ever noticed your vacuum losing suction power? That’s often a sign of a clogged hose.
Sometimes, larger objects accidentally get sucked in and create a blockage. Think about the last time you vacuumed up a stray sock or a coin. These items can easily obstruct the hose, making your vacuum less effective.
Importance Of Regular Maintenance
Regular maintenance of your vacuum hose can save you a lot of trouble. By keeping it clear, you ensure your vacuum performs at its best. A well-maintained vacuum can prolong the life of your carpets and floors.
Consider setting a reminder to check and clean your vacuum hose every month. This small habit can prevent bigger issues down the road. Wouldn’t you prefer a hassle-free vacuuming experience?
Remember, a clean hose means better suction and a cleaner home. Don’t wait until there’s a problem; take proactive steps to keep your vacuum in top shape.

Credit: www.bookcleango.com
Tools Needed For The Job
Unclogging a vacuum hose is a straightforward task. You will need a few tools to get the job done effectively. Having the right tools ensures you can remove the clog easily and keep your vacuum working well. Let’s explore the essential and optional tools for this job.
Essential Tools
First, you need a screwdriver. This helps you remove any screws on the vacuum hose. A small wire brush is also useful. It helps you clean out the debris stuck inside the hose. A flashlight helps you see the clog clearly. Make sure to have a pair of gloves. These protect your hands from dirt and sharp objects.
Optional Tools For Tough Clogs
Sometimes, clogs are tough to remove. For these, you may need a plumbing snake. This tool can reach deep into the hose to pull out the clog. Another helpful tool is a coat hanger. Straighten it out and use it to push or pull the debris. A vacuum cleaner with a reverse suction option can also help. It can push the clog out from the hose.
Safety Precautions
Ensure the vacuum is unplugged to avoid electric shock. Wear gloves to protect your hands from debris.
When it comes to unclogging a vacuum hose, safety should always be your top priority. It’s easy to overlook simple precautions, but ignoring them can lead to injury or damage. This section will guide you through essential safety steps to ensure a smooth and risk-free unclogging process.
Unplugging The Vacuum
Before you start, always unplug the vacuum. This might seem obvious, but it’s a step that many people forget in their haste.
Unplugging ensures that the vacuum doesn’t accidentally turn on while you’re working on it. This can prevent electrical shocks and injuries from moving parts.
Imagine reaching into the hose and the vacuum suddenly powers up. That’s an accident waiting to happen. Always double-check that the power cord is disconnected.
Protective Gear
Wearing the right protective gear can make a big difference. Gloves are a must. They protect your hands from sharp objects that might be lodged inside the hose.
Also, consider wearing safety goggles. Debris can sometimes fly out unexpectedly, and you don’t want anything getting into your eyes.
Have you ever had dust blow back into your face? It’s not pleasant. A simple face mask can prevent inhaling dust and allergens.
Taking these small steps can save you from bigger problems. Have you ever had a close call when working on something at home? Share your story in the comments below!
By being cautious and thorough, you ensure that the process of unclogging your vacuum hose is both effective and safe.

Credit: www.bennelsongolfcars.com
Initial Inspection
Begin by checking the vacuum hose for visible blockages or damage. Ensure all connections are secure and intact.
### Initial Inspection
The initial inspection is crucial before diving into any repair work on your vacuum hose. It helps pinpoint the problem and saves time. A thorough check can often reveal simple issues that are easily fixed.
####
Checking For Visible Blockages
Start by unplugging your vacuum cleaner. Safety first!
Next, detach the hose from both ends. Lay it on a flat surface to inspect the interior.
Shine a flashlight into the hose to look for any visible blockages. Items like hair, small toys, or debris could be the culprits.
If you see any obstructions, use a long, flexible tool like a broom handle to gently push them out. Avoid using sharp objects to prevent damage.
####
Assessing Hose Flexibility
After checking for blockages, it’s time to assess the hose’s flexibility. A stiff or cracked hose can affect performance.
Gently bend the hose in different directions. If it feels rigid or you notice any cracks, it might be time for a replacement.
However, if the hose flexes easily and returns to its original shape, it’s likely in good condition. A flexible hose ensures optimal suction and prolongs the vacuum’s life.
Have you ever found a surprising item clogging your vacuum hose? Share in the comments!
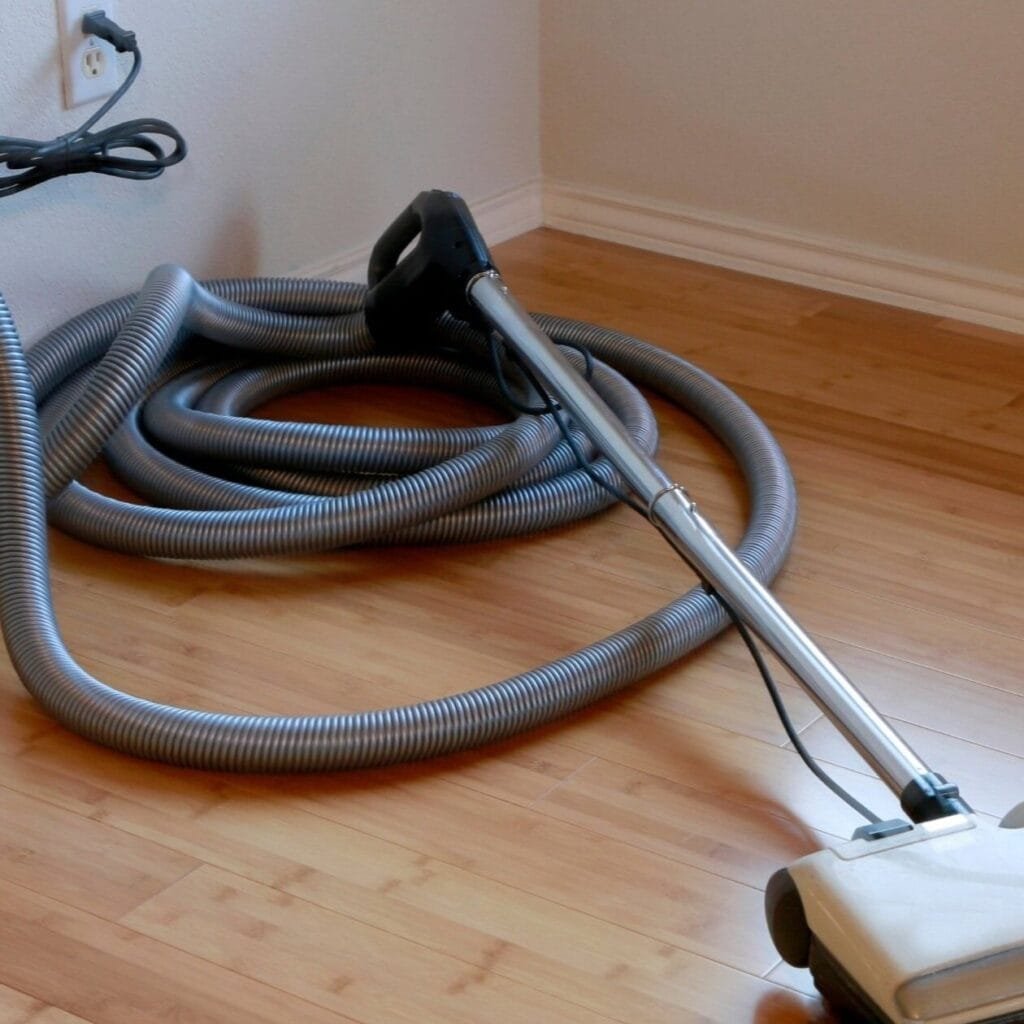
Removing The Hose
Detach the vacuum hose from the main body. Carefully pull apart the connected sections. Ensure there is no debris blocking the hose.
When your vacuum cleaner isn’t working at its best, the hose could be the culprit. Removing the hose may sound daunting, but it’s a straightforward process that anyone can do. Let’s break it down into simple steps.
###
Detaching From The Vacuum
First, ensure the vacuum is unplugged for safety. Locate where the hose connects to the vacuum body. Most models have a button or clip that releases the hose.
Press the button or unclip the latch. Gently pull the hose away from the vacuum. Sometimes a little wiggle is needed if it’s snug.
If your vacuum has a separate attachment for the hose, remove it as well. Keep track of any small parts or screws.
###
Inspecting Both Ends
Once the hose is detached, check both ends for blockages. Look for visible debris or clogs. A flashlight can help you see inside.
Run your fingers around the edges of the hose ends. Feel for any obstructions or rough patches.
You might find hair, dust, or small objects stuck inside. Gently remove these with your fingers or a small tool like tweezers.
Has your vacuum hose been acting up lately? Share your experiences and tips in the comments below!
Clearing The Blockage
Dealing with a clogged vacuum hose can be frustrating, but clearing the blockage doesn’t have to be a daunting task. With a few simple tools and some patience, you can have your vacuum running smoothly again. Let’s dive into some effective methods to get the job done.
Using A Straightened Wire Hanger
If you suspect a blockage in your vacuum hose, a straightened wire hanger can be a handy tool. Begin by carefully straightening out a wire hanger, ensuring there are no sharp edges that could damage the hose.
Gently insert the straightened hanger into the vacuum hose. Slowly push it through, twisting slightly to help loosen and dislodge the debris. If you encounter resistance, avoid forcing it. Instead, try to maneuver around the blockage to break it up.
Once you feel the blockage has been cleared, remove the hanger and check if the hose is now unobstructed. Reattach the hose to the vacuum and test its suction. This method is quick and often effective for minor clogs.
Applying A Plumber’s Snake
For more stubborn clogs, a plumber’s snake can be very effective. This tool is designed to navigate through pipes and hoses, making it perfect for tackling tough blockages.
Start by feeding the plumber’s snake into the vacuum hose. Slowly turn the handle to extend the snake further into the hose. As you advance, the snake will help break up and grab onto the debris causing the clog.
Once the snake has reached the blockage, continue to twist and push until you feel the clog begin to loosen. Carefully retract the snake, bringing the debris out with it. After removing the blockage, reassemble your vacuum and test its performance. You’ll be amazed at how much difference a clear hose makes.
Have you ever used one of these methods? What other techniques have worked for you when dealing with a clogged vacuum hose? Share your experiences and tips in the comments below!
Reassembling The Vacuum
After successfully unclogging your vacuum hose, the next crucial step is reassembling the vacuum. This process is straightforward but requires attention to detail to ensure your vacuum functions optimally. Follow these steps carefully to get your vacuum back in working order.
Reattaching The Hose
The first step in reassembling your vacuum is to reattach the hose. Ensure the hose is clean and free of any remaining debris. Align the hose with the vacuum’s intake port.
Press the hose firmly into place. You might hear a click or feel it snap into position, indicating it’s securely attached.
Double-check that the hose is not twisted or kinked. A twisted hose can reduce suction and make your vacuum less effective.
Ensuring A Secure Fit
Now that the hose is reattached, it’s important to ensure a secure fit. Check the connection points to make sure they are tight and there are no gaps.
A loose fit can cause air leaks, reducing the vacuum’s performance. Gently tug on the hose to test its stability. It should not come loose with a light pull.
If you notice any looseness, remove the hose and reattach it, ensuring it is properly aligned. This step might seem minor, but a secure fit is essential for your vacuum to work efficiently.
Have you ever reassembled a vacuum only to find it didn’t work properly? Often, it’s because the hose wasn’t securely attached. Taking a few extra minutes to ensure a snug fit can save you from frustration later.
Once you’ve confirmed the hose is securely attached, you can proceed to test your vacuum. Plug it in and turn it on to make sure everything is functioning correctly.
Reassembling your vacuum carefully ensures it remains in top condition and performs its best during your cleaning sessions. Remember, attention to detail makes a big difference!
Testing The Vacuum
Testing the vacuum is a crucial step in ensuring that your vacuum hose is functioning properly after you’ve unclogged it. This step helps you confirm that the blockage is completely removed and that your vacuum is back to its optimal performance. Let’s break it down into manageable parts.
Running The Vacuum
First, plug in your vacuum and turn it on. Listen carefully to the motor’s sound. If it sounds strained or different from usual, there might still be a blockage.
Move the vacuum over a small area of your floor. Pay attention to how it feels and sounds. Does it glide smoothly, or does it seem to struggle?
Checking For Proper Suction
After running the vacuum, the next step is to check for proper suction. Place your hand near the hose’s end. You should feel a strong pull indicating that the suction is working efficiently.
If the suction feels weak, your vacuum might still have a partial blockage. Alternatively, there could be an issue with the motor or filter.
Consider changing or cleaning the filter if the suction is not up to the mark. A clogged filter can significantly reduce your vacuum’s efficiency.
Have you ever experienced a sudden decrease in your vacuum’s performance? It’s often due to a minor issue like a clogged hose. By following these steps, you ensure your vacuum operates at its best. What other methods have you tried to fix your vacuum?
Preventive Measures
Keeping your vacuum hose clean is important. It helps your vacuum work better. It also makes it last longer. Taking some preventive measures can save you time and trouble.
Regular Cleaning
Cleaning the vacuum hose often is a good habit. Check the hose every few weeks. Look for dirt or hair stuck inside. Use a stick or a long brush to push out any blockages. You can also rinse the hose with water. Make sure it is completely dry before using it again. This will help keep the vacuum running smoothly.
Avoiding Common Clogging Materials
Some things can clog your vacuum hose easily. Avoid vacuuming up large debris. Small toys, paper clips, and coins can cause blockages. Loose strings and hair can also get tangled. Try to pick up these items by hand. This simple step can prevent many clogs.
Troubleshooting Persistent Issues
Even after following all the steps, your vacuum hose might still be clogged. This can be frustrating. Here are some ways to troubleshoot persistent issues.
When To Call A Professional
Sometimes, DIY methods may not work. If your vacuum hose remains clogged, it may be time to call a professional. They have the tools and experience to fix the issue quickly. If you notice any unusual sounds or smells coming from your vacuum, seek professional help.
Possible Signs Of Damage
Persistent clogs might point to a damaged hose. Look for cracks, tears, or holes. Check if the hose is loose at the ends. Damaged hoses can cause loss of suction and make your vacuum less effective. Replacing a damaged hose can solve many issues.

Credit: www.drainblasterbill.com
Frequently Asked Questions
What Is The Best Way To Unclog A Vacuum Hose?
Detach the hose and check for blockages. Use a long, flexible brush to dislodge debris. Rinse with water and let it dry completely before reattaching.
How To Get Clogged Hair Out Of A Vacuum Hose?
Disconnect the vacuum hose. Use a straightened wire hanger or a long brush to remove the hair. Rinse the hose with warm water and let it dry completely before reattaching.
How To Get Something Unstuck From A Vacuum Hose?
Turn off the vacuum. Detach the hose. Use a long object like a broomstick to push the item out. Check for blockages.
How To Unblock The Hose On A Shark Vacuum?
To unblock the hose on a Shark vacuum, first, turn off and unplug the vacuum. Remove the hose, then check for clogs and clear any debris using a long object or compressed air. Reattach the hose and test the vacuum.
Conclusion
Unclogging a vacuum hose is easier than you might think. Follow the steps, and your vacuum will work like new. Regular maintenance helps prevent future clogs. Clean the hose often to keep it clear. Make sure you check all parts for debris.
A well-maintained vacuum saves time and effort. Happy cleaning!