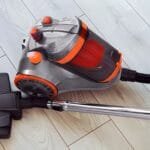
Is your Shark cordless vacuum not working quite right? Maybe the hose is worn out or damaged, and it’s stopping your vacuum from doing its best.
Replacing the hose might sound tricky, but it’s easier than you think—and it can save you time and money. In this guide, you’ll learn exactly how to replace the hose on your Shark vacuum step by step. By the end, your vacuum will be ready to clean like new again.
Keep reading to discover the simple fix that will get your cleaning back on track.
Tools Needed
Replacing the hose on your Shark cordless vacuum needs some basic tools. Gathering the right tools helps the job go smoothly. It saves time and avoids frustration. Here is a list of tools you will need.
Phillips Head Screwdriver
You need a Phillips head screwdriver to remove screws. This tool fits the cross-shaped screw heads on your vacuum. It allows easy access to the hose and other parts.
Flathead Screwdriver
A flathead screwdriver helps to pry open clips or connectors. It is useful for loosening tight parts without damage. Keep it handy for delicate tasks.
Replacement Hose
Get the exact replacement hose designed for your Shark model. Using the correct hose ensures proper fit and function. Check the model number before buying.
Soft Cloth
A soft cloth helps clean dust and dirt during replacement. Wipe down parts to keep your vacuum working well. Clean parts fit better and last longer.
Work Gloves
Wear work gloves to protect your hands from sharp edges. They provide a better grip on tools and parts. Gloves make the task safer and more comfortable.
Safety Precautions
Replacing the hose on your Shark Vacuum Cordless requires care. Safety is important to avoid injury and damage. Follow these simple steps to keep yourself safe and protect your vacuum.
Disconnect The Vacuum From Power
Always turn off the vacuum before starting. Remove the battery or unplug the charger. This stops the vacuum from turning on by mistake.
Wear Protective Gloves
Use gloves to protect your hands. The hose parts can have sharp edges or dirt. Gloves keep your skin safe and clean.
Work In A Clear Space
Choose a clean, flat area to work on. This helps you find small parts easily. Avoid clutter to prevent accidents.
Handle Parts Gently
Do not force parts to fit. Gentle pressure prevents breaking the hose or connectors. Check the hose fit before attaching fully.
Locating The Hose
Locating the hose on your Shark cordless vacuum is the first step to replacing it. The hose connects the main body of the vacuum to various attachments. It carries dirt and debris from the floor to the dustbin. Knowing where to find the hose helps you check its condition and remove it safely.
The hose is usually flexible and long enough to reach tight spaces. It may look like a ribbed tube or a smooth plastic pipe. Finding it is easy once you understand how your vacuum parts fit together.
Check Near The Vacuum Head
Start by examining the vacuum head or nozzle. The hose often attaches here. Look for a tube coming out from the bottom or side of the vacuum head. This tube is the hose that carries debris upward.
Follow The Handle Upwards
Trace the hose by following the handle or wand. The hose may run inside or alongside the wand. It connects the vacuum head to the main body where the motor and dustbin are located.
Look At The Main Body
The hose ends at the main vacuum body. This is where the suction happens. The hose usually clicks or slides into a port on the body. Check this connection point to confirm the hose location.
Identify The Hose Material
The hose material often differs from other parts. It feels flexible, ribbed, or smooth plastic. This helps spot it among other vacuum components. Knowing the hose type aids in selecting the right replacement.
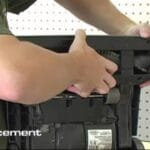
Removing The Old Hose
Removing the old hose from your Shark cordless vacuum is the first step to replace it. This process is simple and takes just a few minutes. Follow these clear instructions to safely remove the hose without damaging any parts.
Detach From Vacuum Body
Start by turning off the vacuum and placing it on a flat surface. Locate the hose connection on the main vacuum body. Hold the vacuum steady and gently twist the hose counterclockwise. Pull the hose away from the vacuum once it loosens. Avoid using too much force to prevent breaking the connection points.
Disconnect Attachments
Check both ends of the hose for any attached tools or nozzles. Press the release buttons or clips on these attachments. Slide each attachment off carefully. Keep the attachments safe for reusing with the new hose. Ensuring all parts are free makes the replacement easier.
Choosing The Right Replacement Hose
Choosing the right replacement hose for your Shark Vacuum Cordless is important. The hose must fit well and work properly. Picking the wrong hose can cause poor suction or damage. Focus on key factors like model compatibility, material, and length. This will help you select the best hose for your vacuum.
Model Compatibility
Check your vacuum’s model number first. Different Shark models have different hose designs. Using a hose made for a different model can lead to leaks or loose connections. Find the exact model number on your vacuum or in the manual. Then buy a hose that matches that model. This ensures a perfect fit and strong suction.
Material And Length
Choose a hose made from durable materials like reinforced plastic or rubber. These materials last longer and resist cracks. Avoid hoses that feel thin or flimsy. Length matters too. A hose that is too short limits your reach. Too long can be bulky and hard to store. Pick a length that fits your cleaning needs and storage space.
Installing The New Hose
Installing the new hose on your Shark vacuum cordless is a simple process. Follow clear steps to ensure a tight and secure fit. This helps the vacuum work well and last longer.
Attach To Vacuum Body
Start by aligning the hose end with the vacuum body connection. Push the hose firmly into place until you hear a click. This sound means the hose is properly attached. Check for any gaps to avoid air leaks.
Secure Attachments
Next, secure any clips or locks on the hose. These keep the hose from coming loose during use. Double-check the connections by gently pulling the hose. Make sure it stays firmly attached before using the vacuum.
Testing The Hose
After replacing the hose on your Shark vacuum cordless, testing it is important. This step ensures the vacuum works properly and cleans well. Testing helps find any problems early. It saves time and effort later. Follow these easy steps to check your new hose.
Check For Leaks
Turn on the vacuum and listen closely for air leaks. Move the hose around slowly. Pay attention to any hissing sounds. Look for weak spots or holes in the hose. Feel for air escaping with your hand. If you find leaks, the hose may need resealing or replacement.
Ensure Proper Suction
Place the vacuum on a flat surface. Test suction by picking up small debris like crumbs. Watch how well the vacuum pulls dirt inside. Weak suction means the hose may not be connected right. Reattach the hose firmly and test again. Strong suction ensures your vacuum cleans efficiently.
Maintenance Tips
Keeping your Shark vacuum hose in good shape helps your vacuum work better and last longer. Regular care stops clogs and damage. Simple steps save you time and money on repairs.
Follow these easy maintenance tips to keep your vacuum hose clean and strong. They help your vacuum pick up dirt fast and keep air flowing well.
Cleaning The Hose Regularly
Remove the hose from the vacuum carefully. Use a long brush or a flexible rod to clear dirt inside. Rinse with warm water if the hose is very dirty. Let it dry completely before reattaching.
Checking For Cracks And Holes
Look over the hose for small cracks or holes. These let air escape and reduce suction power. Replace the hose if you find damage to keep your vacuum working well.
Storing The Hose Properly
Store the hose in a cool, dry place. Avoid bending it sharply or placing heavy objects on it. Proper storage stops damage and keeps the hose flexible for easy use.
Using The Correct Attachments
Use the right attachments with your Shark vacuum. Wrong tools can strain the hose and cause leaks. Fit attachments tightly to avoid air loss and keep strong suction.
Frequently Asked Questions
How Do I Know When My Shark Vacuum Hose Needs Replacement?
Check for cracks, holes, or loss of suction in the hose. These signs indicate wear and tear. If cleaning doesn’t restore performance, replacing the hose is necessary to maintain vacuum efficiency.
Can I Replace The Shark Vacuum Hose Myself?
Yes, you can replace the hose yourself. Unclip the old hose carefully, align the new one, and attach it firmly. Follow the user manual for specific instructions to avoid damaging the vacuum.
Where Can I Buy A Replacement Hose For Shark Vacuum?
You can purchase replacement hoses from Shark’s official website, authorized retailers, or online marketplaces. Ensure the hose matches your vacuum model for compatibility and optimal performance.
How Much Does Replacing A Shark Vacuum Hose Cost?
Replacement hose costs vary between $15 and $40, depending on the model. Genuine parts may cost more but ensure durability and proper fit for your vacuum.
Conclusion
Replacing the hose on your Shark cordless vacuum is simple. Follow the steps carefully for the best results. Take your time to avoid mistakes. Your vacuum will work like new again. Regular maintenance helps keep it running longer. Now, you can clean your home without hassle.
Keep this guide handy for future reference. Enjoy fresh, clean floors every day.