Have you ever run out of vacuum cleaner bags at the worst possible moment? It’s frustrating when your cleaning plans come to a halt because you don’t have a replacement.
But what if you could make your own vacuum cleaner bag right at home? Imagine saving money, reducing waste, and never worrying about running out again. In this guide, you’ll discover simple steps to create a homemade vacuum cleaner bag using materials you probably already have.
Keep reading, and you’ll be surprised how easy and practical this DIY trick can be for your cleaning routine.
Materials Needed
Making a homemade vacuum cleaner bag is simple and budget-friendly. You need the right materials to create a bag that fits well and works effectively. Choosing the correct fabric and supplies ensures your bag lasts long and traps dust properly.
Types Of Fabric
Choose a fabric that is strong and breathable. Cotton canvas is a great option. It holds up well and lets air pass through. Muslin cloth also works. It is soft but sturdy enough for dust collection.
Avoid very thin or stretchy fabrics. They can tear or let dust escape. Look for fabrics that feel thick but not stiff. This balance helps keep your vacuum cleaner working well.
Additional Supplies
You will need some basic sewing tools. Scissors, needle, and thread are a must. Use a strong thread to sew the bag tightly. This stops dust from leaking out.
A ruler or measuring tape helps get the right size. A marker or chalk can mark the fabric. If you want, add a zipper or Velcro for easy emptying. But simple stitches work fine too.
Preparing The Fabric
Preparing the fabric is the first step in making a homemade vacuum cleaner bag. Choosing the right fabric ensures good dust collection and durability. The fabric should be strong but breathable enough to let air pass through. Cotton or felt works well for this purpose. After selecting the fabric, the next tasks are measuring, cutting, and sealing the edges to prevent fraying.
Measuring And Cutting
Start by measuring your vacuum cleaner’s existing bag or the space inside the vacuum. Add an extra inch to each side for sewing. Use a ruler or measuring tape for accuracy. Mark the fabric with chalk or a pencil. Cut the fabric carefully along the marks using sharp scissors. Straight cuts help the bag fit better and look neat.
Sealing Edges
Sealing the edges stops the fabric from fraying during use. Fold each edge about half an inch toward the inside. Pin the folds to hold them in place. Sew along the folded edge using a needle and thread or a sewing machine. If you don’t sew, use fabric glue or iron-on tape as an alternative. Properly sealed edges make the bag last longer and keep dust inside.
Constructing The Bag
Constructing a homemade vacuum cleaner bag is a simple task that anyone can do. It takes just a few materials and some basic sewing skills. The key is to make the bag strong and sealed well. This keeps dust and dirt inside without leaking. Follow these steps to create a durable bag for your vacuum cleaner.
Start by choosing a fabric that is thick but breathable. Cotton or linen works well. Cut the fabric into the right size, usually a rectangle or square. Leave extra space for sewing the edges and attaching the opening. The bag should fit snugly inside your vacuum but still have room to expand with dust.
Sewing Techniques
Use a strong needle and thread to sew the bag. Double stitching the edges adds strength. Sew slowly to keep the stitches even and tight. Avoid gaps or loose threads. Turn the fabric inside out before sewing for a clean finish. This hides the stitches inside and makes the bag last longer.
Make sure to leave one side open for attaching the vacuum connection. Reinforce the corners with extra stitches. This prevents tearing when the bag fills up. A simple straight stitch works well. You can also use a sewing machine for faster and neater results.
Attaching The Opening
The opening is where the vacuum hose fits into the bag. Cut a small hole in the fabric that matches the size of the vacuum inlet. Use a ring or stiff fabric to keep the hole from stretching out. Sew this piece firmly onto the opening edge. This creates a tight seal to stop dust from escaping.
Check the fit by attaching the bag to your vacuum. Adjust the opening if needed to make it snug. Secure the edges of the opening with extra stitches. This keeps the bag stable during use. Proper attachment ensures the vacuum works well and the bag lasts longer.
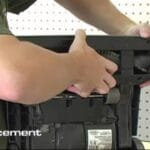
Fitting The Bag To Your Vacuum
Fitting the homemade vacuum cleaner bag correctly is important. A good fit keeps dust inside and stops leaks. It also helps your vacuum work well and last longer.
Customizing The Size
Measure the space inside your vacuum bag compartment first. Cut the bag material to fit this space comfortably. Leave a little extra room for seams or folds. This helps the bag fit without stretching or tearing. Use a marker and ruler for straight lines. Make sure the bag is not too tight or too loose.
Securing The Bag
Attach the bag securely to the vacuum’s inlet or holder. Use strong tape or a rubber band to seal it. Check that no gaps or holes remain around the edges. A tight seal stops dust from escaping. Test by turning on the vacuum and watching for leaks. Adjust the bag and fasteners until it fits snugly and holds in place well.
Maintaining Your Diy Vacuum Bag
Maintaining your DIY vacuum cleaner bag helps keep your vacuum working well. Clean bags last longer and keep your home dust-free. Taking care of the bag saves money and time.
Simple steps can help you maintain your vacuum bag efficiently. Regular checks and cleaning improve suction power. Follow these tips for best results.
Cleaning Tips
Empty the bag carefully to avoid dust spills. Use a soft brush to remove dirt from the bag’s surface. Avoid washing the bag with water, as it can damage the material. Instead, tap the bag gently to shake out trapped dust. Check the vacuum’s filter and clean it regularly too. Clean parts help your vacuum work better and last longer.
When To Replace
Replace the bag when you see holes or tears. A full bag reduces suction and makes the vacuum less effective. Also, change the bag if it smells bad or looks dirty inside. Using a worn-out bag can harm your vacuum motor. Keep an eye on the bag’s condition to know the right time to swap it out.
Troubleshooting Common Issues
Making a homemade vacuum cleaner bag can save money and reduce waste. Sometimes, small problems can happen with these DIY bags. Fixing these issues quickly keeps your vacuum working well and your home clean. Below are some common problems and simple ways to solve them.
Leaks And Dust Escape
Leaks let dust escape from the bag and reduce vacuum power. Check the bag seams for holes or weak spots. Use strong tape or glue to seal any gaps. Avoid overfilling the bag, as this can cause tears. Make sure the bag fits tightly inside the vacuum. Replace the bag if dust still escapes despite repairs.
Bag Durability
Durability is key for a good vacuum bag. Thin or weak materials tear easily. Choose thick cloth or strong paper for your bag. Reinforce edges with extra fabric or tape. Avoid using wet or damp materials, which weaken the bag. Change the bag regularly to prevent wear and tear.
Frequently Asked Questions
What Materials Do I Need For A Homemade Vacuum Bag?
You need sturdy fabric or plastic, a sewing kit or tape, and scissors. Choose breathable, durable material to trap dust effectively.
How Do I Ensure My Homemade Vacuum Bag Fits Properly?
Measure your vacuum’s bag compartment accurately. Cut the material to size and seal edges tightly for a snug fit.
Can Homemade Vacuum Bags Filter Dust Effectively?
Yes, if made with dense, breathable fabric or multiple layers. Proper sealing prevents dust leakage, ensuring good filtration.
How Often Should I Replace My Homemade Vacuum Bag?
Replace when full or every few weeks with regular use. Frequent replacement maintains suction and prevents damage to your vacuum.
Conclusion
Making a homemade vacuum cleaner bag saves money and reduces waste. It uses simple materials you can find at home. The steps are easy and quick to follow. This small project helps keep your vacuum working well. You control the size and thickness of the bag.
Cleaning becomes easier and less costly. Try making one and see the difference yourself. A little effort brings good results. Why buy when you can create? Simple, smart, and effective.