Is your vacuum cleaner cord not working right? Maybe it’s frayed, won’t retract, or doesn’t power up your vacuum.
You might feel stuck or worried about buying a new one. But before you spend money on a replacement, there’s good news: fixing your vacuum cleaner cord is easier than you think. You’ll discover simple steps to get your vacuum back in action quickly.
Keep reading, and you’ll save time and money while avoiding frustration. Your vacuum deserves a second chance—and so do you.
Credit: discover.hubpages.com
Common Cord Problems
Vacuum cleaner cords often face damage from daily use. Problems with these cords can stop your vacuum from working. Knowing common cord issues helps you fix them quickly. This section explains three common cord problems and how to spot them.
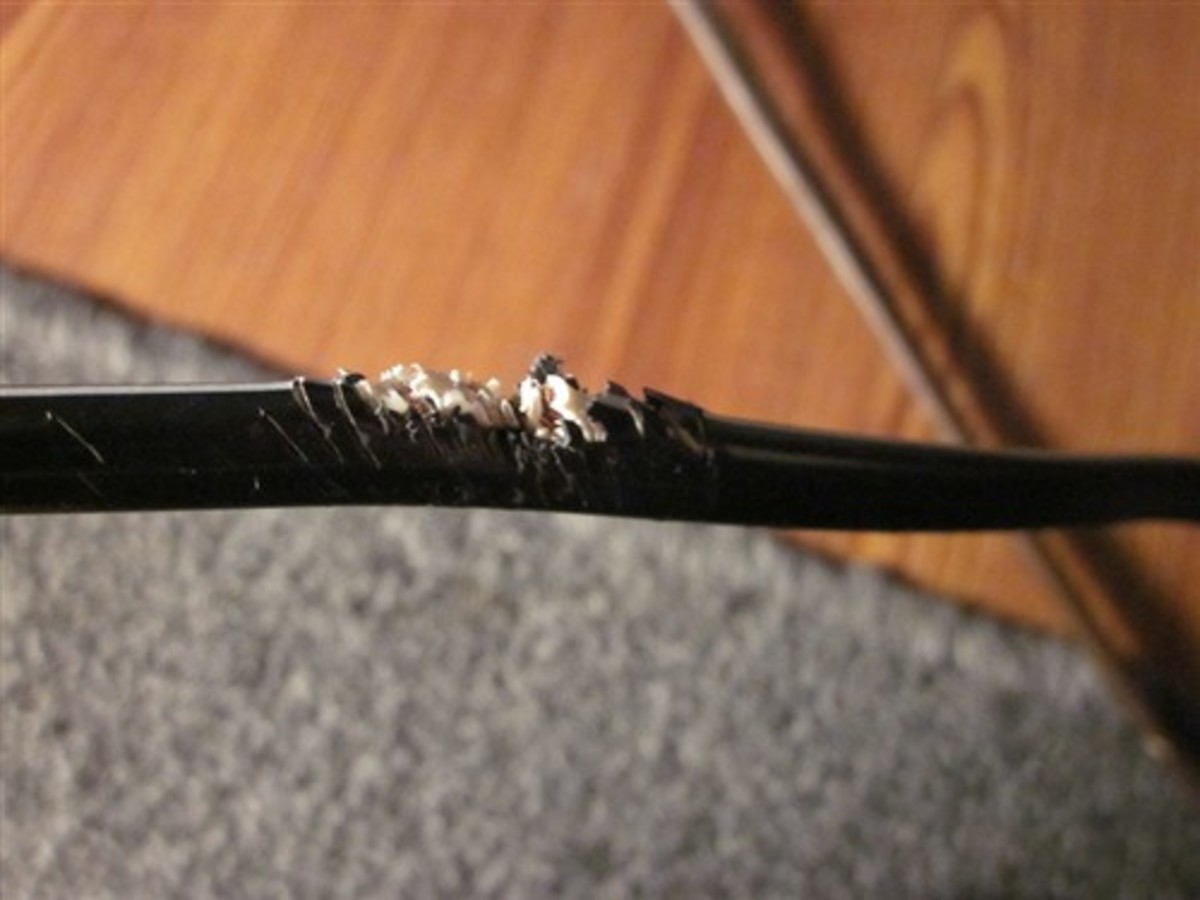
Frayed Or Exposed Wires
Frayed wires show as worn or broken outer layers of the cord. Exposed wires can be dangerous and cause shocks. These issues happen from bending or pulling the cord too much. Check the entire cord length for any damage. Avoid using the vacuum if wires show.
Broken Or Cut Cord
A broken or cut cord stops electricity from flowing. This problem often happens if the cord is pinched in a door or sharp object. Sometimes the cord looks fine but has an internal break. Test the cord carefully before trying to fix it. Replace the cord if it is badly cut.
Loose Connections
Loose connections happen inside the plug or where the cord meets the vacuum. This causes the vacuum to turn off or work irregularly. Wiggling the cord may change the power flow. Open the plug to check for loose wires. Tighten or reconnect wires for a secure fit.
Credit: www.youtube.com
Safety Precautions
Fixing a vacuum cleaner cord can be simple and safe. Safety is very important before starting any repair. This helps avoid electric shocks and other injuries. Follow these safety steps carefully to protect yourself and your home.
Unplugging The Vacuum
Always unplug the vacuum cleaner from the power outlet first. This stops electricity from flowing through the cord. Never work on the cord while it is plugged in. It is the easiest way to prevent electric shocks. Check that the plug is fully removed before you begin fixing.
Using Protective Gear
Wear protective gear like gloves and safety glasses. Gloves protect your hands from sharp wires or cuts. Safety glasses keep dirt or sparks away from your eyes. Using these simple tools lowers the risk of injuries. Take care and be cautious during the repair process.
Tools And Materials Needed
Fixing a vacuum cleaner cord requires the right tools and materials. Having everything ready makes the repair easier and faster. Below is a list of what you need to complete the job safely and well.
Basic Repair Tools
- Screwdrivers (flathead and Phillips) to open the vacuum casing.
- Wire strippers to remove the insulation from the cord wires.
- Electrical tape to cover and protect the repaired wires.
- Multimeter to check for electrical continuity and faults.
- Pliers for gripping and twisting wires securely.
- Heat shrink tubing to insulate wire connections safely.
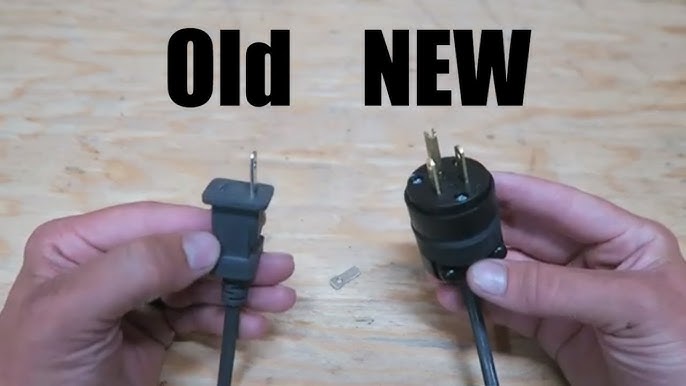
Replacement Parts
- Replacement power cord that matches the vacuum model.
- Wire connectors or soldering materials for joining wires.
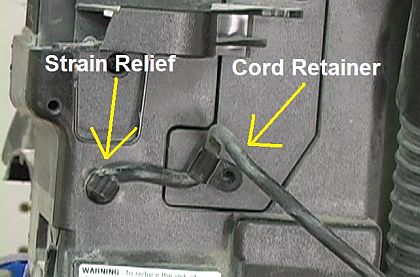
- New strain relief clamp to protect the cord from bending.
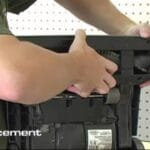
Credit: www.instructables.com
Step-by-step Repair Guide
Fixing a vacuum cleaner cord is simple with the right steps. Follow this guide to repair your cord safely and quickly. Each step explains what to do and why it matters. Take your time and work carefully for the best results.
Inspecting The Cord
Start by unplugging the vacuum cleaner. Look closely at the entire cord. Check for cuts, burns, or worn spots. Notice any loose wires or broken insulation. Mark the damaged areas with a small piece of tape. This helps find the exact spots to fix.
Removing Damaged Sections
Use wire cutters to remove the damaged part of the cord. Cut a bit beyond the marked area. Make sure both ends are clean and straight. Strip about one inch of insulation from each end. This exposes the inner wires needed for repair.
Splicing And Securing Wires
Match the wire colors from each end. Twist the same colors tightly together. Use electrical tape or wire connectors to cover the splice. Wrap the tape well to avoid any exposed wire. Secure the cord with zip ties to prevent strain.
Testing The Repair
Plug the vacuum cleaner into a power source. Turn it on to check if it works properly. Watch for sparks, smells, or unusual sounds. If everything works, unplug and store your tools. If not, recheck your splice or seek professional help.
Preventing Future Cord Damage
Preventing future damage to your vacuum cleaner cord saves time and money. A well-cared cord lasts longer and works better. Small habits can protect the cord from wear and tear. Follow simple steps to keep your cord safe and strong.
Proper Cord Storage
Always wrap the cord loosely around the vacuum. Avoid tight loops that stress the wire inside. Use the built-in hooks or clips if your vacuum has them. Store the vacuum in a dry place away from heavy objects. This prevents crushing or bending the cord.
Avoiding Sharp Bends
Do not bend the cord sharply at any point. Sharp bends break the internal wires quickly. Keep the cord straight or gently curved during use. Avoid pulling the vacuum by the cord. This can cause damage near the plug or base.
Regular Maintenance Tips
Check the cord often for cracks or frays. Clean the cord with a dry cloth to remove dirt. Do not use water or cleaning sprays on the cord. Repair minor damage early to stop it from getting worse. Replace the cord if you see exposed wires.
When To Replace The Cord Or Vacuum
Knowing when to replace the vacuum cleaner cord or the entire vacuum is important. A damaged cord can cause safety risks and affect cleaning performance. Some issues with the cord can be fixed, but others need a full replacement.
Choosing the right time to replace the cord or vacuum saves money and keeps your home safe. Look out for signs that the cord or vacuum is no longer working well.
Signs The Cord Needs Replacement
Frayed or exposed wires are a clear sign to replace the cord. Sparks or burning smells during use are dangerous and mean immediate replacement. A cord that feels hot or causes the vacuum to lose power often needs to be replaced.
When To Replace The Vacuum
The vacuum may need replacement if it has frequent breakdowns or poor suction. If the motor or other parts are damaged beyond repair, replacing the vacuum is better. Old vacuums with outdated parts can be less efficient and waste energy.
Safety Considerations
Never use a vacuum with a damaged cord. Electric shocks or fires can happen if the cord is faulty. Always unplug the vacuum before checking or fixing the cord. Safety should be the top priority when handling electrical parts.
Frequently Asked Questions
How Do I Safely Repair A Vacuum Cleaner Cord?
First, unplug the vacuum to avoid shocks. Inspect the cord for damage. Use electrical tape for minor cuts. Replace the cord if severely damaged. Always follow the manufacturer’s safety guidelines when repairing or replacing cords.
What Tools Are Needed To Fix A Vacuum Cord?
You need wire strippers, electrical tape, a screwdriver, and replacement wire. A multimeter helps check for electrical continuity. These tools ensure a proper, safe repair of the vacuum cleaner cord.
Can I Fix A Frayed Vacuum Cleaner Cord Myself?
Yes, minor frays can be fixed using electrical tape. For exposed wires, strip and reconnect them properly. If damage is extensive, consider professional repair or cord replacement to ensure safety.
How To Prevent Vacuum Cleaner Cord Damage?
Avoid pulling the vacuum by the cord. Store the cord properly by winding it loosely. Keep the vacuum away from sharp objects and heat sources. Regularly inspect the cord for early signs of wear.
Conclusion
Fixing your vacuum cleaner cord can save time and money. Take safety steps before starting any repair work. Use basic tools and follow the guide carefully. Check the cord for breaks or worn spots. Replace or fix damaged parts to avoid future issues.
Regular maintenance helps keep your vacuum working well. Small repairs can extend the life of your machine. Stay patient and work step-by-step for best results. Now, your vacuum is ready to clean efficiently again. Simple fixes make a big difference in daily chores.